Table of Contents
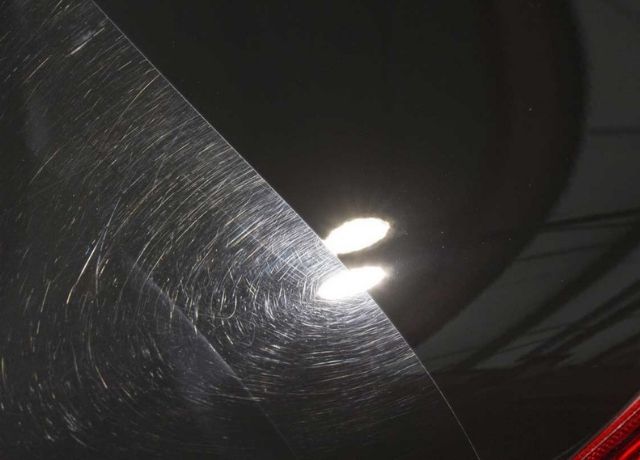
You should be proud of the work you’ve done on your car’s paint job. Your personality and what you value in life are clearly reflected in it. Keeping it in good condition will ensure it lasts for a long time to come. When it comes to your car’s appearance, nothing is worse than swirls.
Swirls are the most common source of paint distortion in cars. Swirl marks may seem little at first, but if ignored, they can quickly become a major problem. It can be a nightmare trying to remove swirl marks from black paint. But there is a way to get them out quickly and easily.
In this post, we will explore how to get swirl marks out of black paint by hand, challenging car swirls, DIY fixes, the best products to use, and how to prevent any future paint swirls. Let’s get started:
What Are Car Swirl Marks?
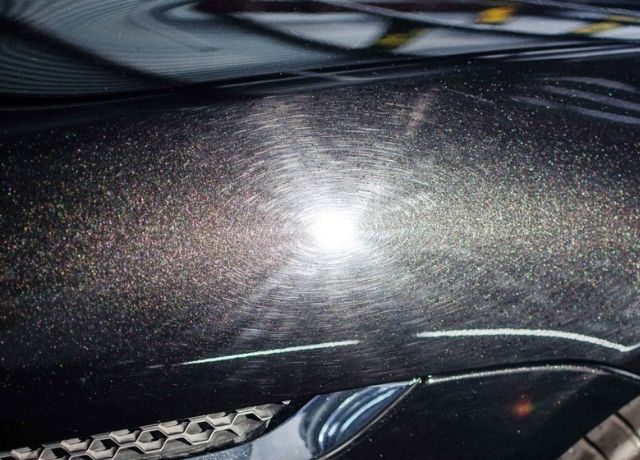
Car swirl marks are one of several forms of paint flaws that can emerge on a vehicle. Swirl marks are a common problem on cars, and they are the result of thousands of tiny scratches building up on the surface of the paint. When the paint isn’t properly cared for during washing and drying, these odd markings appear, and they can lead to a lot more problems than just aesthetic ones.
To make the paint appear dull and unpleasant, swirl markings decrease the paint’s overall shine and brilliance. To avoid being dissatisfied with the appearance of their vehicle, drivers should take care to avoid these blemishes.
Types of Scratches on Cars with Ultimate Fixes | 2022 guide
What Causes Swirl Marks On Cars:
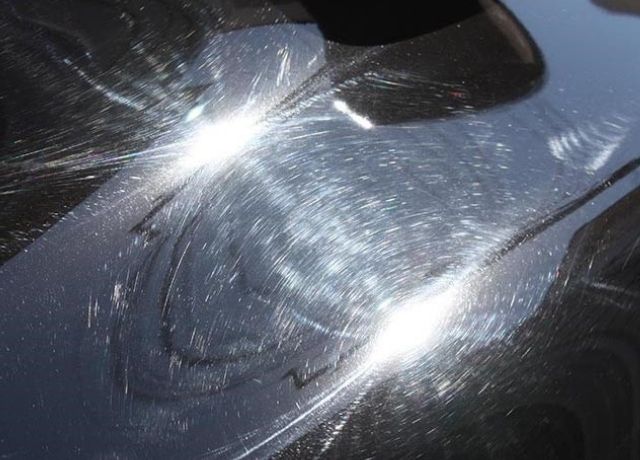
Swirl marks on cars can be the result of a variety of things, however, the most common is inappropriate touching of the paintwork.
Swirl marks on cars are almost exclusively the result of car washes. Yes, the manner you wash your car can result in a large number of these stains. Swirl marks may appear on your car’s finish over time if you dry it using regular towels. There is a chance that having your car washed at an automated car wash will result in the same marks.
Each of these interactions produces friction on the paint, leading to micro-scratches. These micro-scratches increase into thousands over time and aggregate to form swirl marks.
Swirl markings may also emerge due to the use of certain gears and compounds in car detailing or waxing. Polishers/buffers with the wrong pad or an inexperienced person might leave swirl marks. You should therefore pay more attention to the washing technique and choose your waxes carefully.
Please keep in mind that, swirls can appear on the body of your car no matter what color the paint is. Now that we know what causes swirls, we can go on to the meat of the matter: how to get swirls out of black paint. This guide, on the other hand, may also apply to cars that are dark in color but do not have black paint.
How To Get Swirl Marks Out Of Black Paint By Hand?
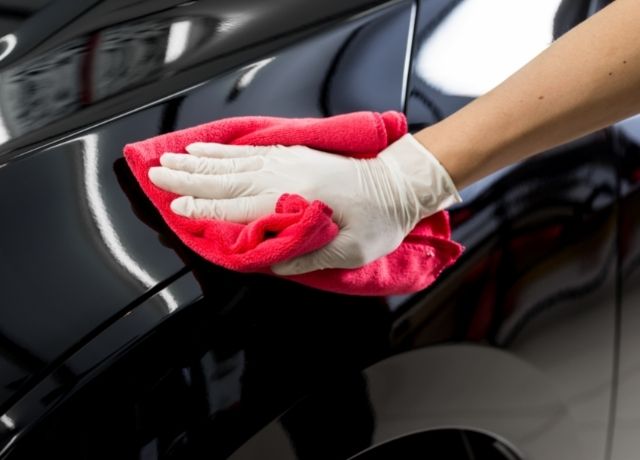
There’s nothing worse than getting swirl marks on your black paint job. But before you go spending money on a professional to fix it, try cleaning it yourself with these tips.
Here are the materials you will need to remove paint swirls.
- Waxing compound
- Paint Cleaner
- Car washing equipment
- Microfiber towel
- Polisher
Wash Your Car:
The only way to clean your car is to wash it panel by panel, starting at the top and working your way down. You can use a pressure washer to wash the car, but make sure you use the suitable nozzle for the job.
You should always wash your car with clean (preferably distilled) water and a quality car wash detergent. After you’ve finished washing, use a high-quality microfiber towel to rinse away any remaining soap and debris and then dry the vehicle.
Park the car in a shady area and gather your car wash supplies.
Examine The Paint:
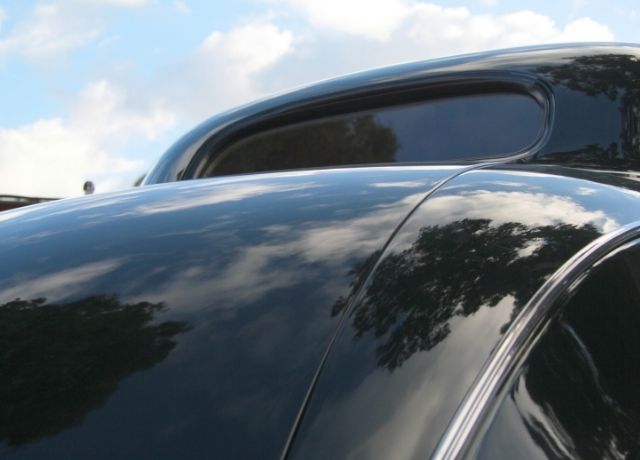
Take your time looking at the paint and pointing out any swirls in the surface of the vehicle. Tape these spots to make sure you don’t miss them when you do this essential checkup.
If you can’t see your car’s body clearly due of the shade where you parked, use a flashlight or open the garage doors to let in some sunlight. That one is over now that you’ve found all the places where the swirl marks appear.
Use the Paint Cleaner:
At this point, you need to apply the paint cleaner. This cleaner aids in the cleaning of your car’s paint while also removing minor imperfections.
However, it is strongly recommended that you read and follow the instructions on the paint cleaner you intend to use before you begin. There are a few paint cleaners that must be used while the vehicle is still wet, so you’ll use them just after washing the car.
Other paint cleaners, on the other hand, should be used on a dry car. You should use such cleaners after washing and drying your car. Non-abrasive chemical-based paint cleansers are ideal for this use.
Using a detailing foam or microfiber towel, apply a little amount of paint cleaning chemical to the regions of the car’s body where you see swirl marks. A leaflet or box with instructions should come with your purchase if there is a specific way to use it.
Polish And Wax The Car:
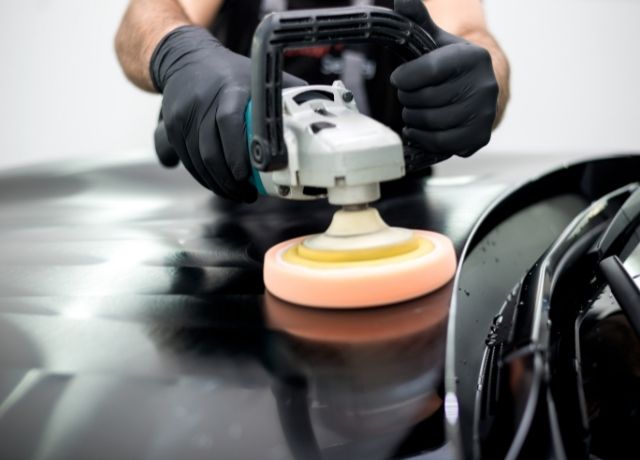
At first, you need to polish and then apply wax to your car. It is critical to polish your car at first, it aids in the restoration of shine and transparency. Polishing will also help to conceal any remaining swirl marks on car that the paint cleaner may have removed.
Clear coat scratches can be covered up with the help of auto polishing products. The effect is that your car will look like new again thanks to the compound you use. Make sure you do your research before purchasing a car polishing product.
Be sure to follow the polishing product’s directions exactly. A microfiber cloth and a small bit of the cleaner are all you need to apply it to the vehicle’s body in a circular motion. After polishing, waxing should be done. Your car’s paint will be better protected if it is waxed.
Some folks use sealants, but we recommend waxing substances. Waxing can help prevent swirl marks from forming on your car’s body, as well as protect your car’s paint from a variety of problems.
What Else?
Paint cleaners may not be able to erase swirl marks from your car’s body in some situations. If this happens to you, consider applying a rubbing compound.
To avoid scratching your car’s paint while working to eliminate swirl marks, consider a rubbing compound that is less abrasive. After using a rubbing compound, you’ll need to polish and wax your vehicle.
How To Remove Swirls From Black Paint (Challenging Car Swirls):
Swirl marks on some cars are so heavy that manual removal is practically impossible, necessitating the use of machine polishing. While high-speed rotary buffers were once commonly employed by detailers to remove swirl marks, their handling and potential for damage made them unsuitable for novices.
However, since machine polishing technology has advanced, we now have quick and easy DA Polishers. These tools are easy to use and produce stunning professional results in half the time of hand polishing.
Things you Will Need:
- Swirl Mark & Car Scratch Remover
- Ceramic Shine
- Decon soap
- Microfiber cloth
- Applicator pad
- DA polisher machine
- Clay bar
- Polishing pad made of foam
Step 1: Clean Your Car:
You must clean your car before using a machine to polish it, just like you did before. If your foam pad is clogged with dirt and filth, you are more likely to scratch your car. As a result, wash and dry your vehicle completely after each use with a quality car wash soap. Wash your car panel by panel from top to bottom, starting with the top and working your way down.
Rinse your wash mitt in the rinse bucket after each panel is cleaned, and then reapply soap. By doing this, you’ll get the best cleaning performance and prevent dirt from being carried around on your vehicle. Use a high-quality microfiber cloth to dry your clothes once you’ve completed washing.
Step 2: Use An Iron Fallout Remover:
Pollution-induced iron buildup is common in most cars. Before continuing on to the next step, you must remove the iron impurities first. Using a high-quality iron fallout remover, apply it to all painted surfaces of your vehicle and let it sit for a few minutes.
When iron contaminates begin to break down, you’ll notice purple blotches all over the car. After about five minutes, rinse and use a microfiber towel to dry the entire vehicle.
Step 3: Clay Your Vehicle:
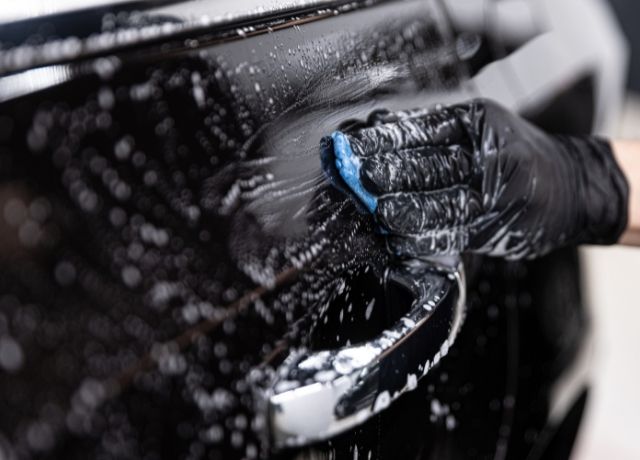
After you’ve washed and dried your car, feel the paint with the back of your fingertips. Is it harsh to the touch? You may have contamination in your paint if this is the case. It’s imperative that you get rid of these impurities, or else they’ll get stuck in your applicator pad and do further harm to your paint. Apply a clay lubricant to both the clay and the car’s surface.
Scrub the paint gently in up-and-down strokes with the clay, working in 2×2 or 3×3 sections. Once the surface is smoothed, you’ll be able to feel the difference! When you’re sure there are no more impurities, use a soft cloth to buff your detailer or clay off the surface.
Use a clay bar to see if the clay is contaminated, and if so, shift it to a fresh side as needed. Rinse your clay mitt well after each panel to remove any impurities that may have accumulated on it. For the paint and glass surfaces of your car, continue to use this procedure.
Step 4: Carefully Examine The Paint:
Your paint should be examined with a flashlight or sunlight. Swirl marks and dullness are signs that the surface needs to be polished and a compound. This is referred to as a two-step method. Minor swirl marks on your car’s paint may only require polishing, so this is a one-step process.
Step 5: Prepare Your Polisher And Pad:
Remove your polisher’s backing plate and place your foam polishing pad in the center of it. It is more difficult to remove swirl marks if your pad is not exactly positioned on the backing plate. Finally, use a polishing pad with a paint swirls remover or a car polish.
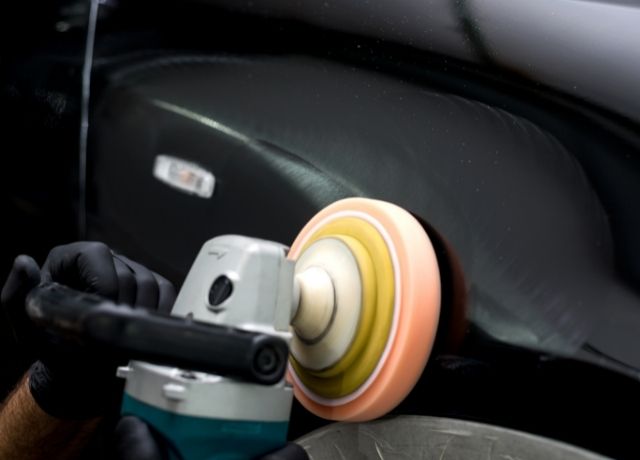
Step 6: Start Polishing Your Car:
Using a low speed, distribute the polish over a 3×3 area before increasing the speed to a level that is comfortable. Maintain a gentle, controlled overlapping motion while buffing the polish; avoid applying excessive pressure.
Using a flashlight, verify your finished product when the polish is clear. Using a higher abrasive polish and pad may be necessary if swirl markings persist. Make the move to a heavy-cut compound and a heavier-cut pad if this is the case. Using another compound and pad, go back to step 3 and double-check your results.
If the car swirl marks have been eliminated, proceed to the next section until the car is completed.
Step 7) Protect The Finish:
It’s time to apply a high-quality sealer or ceramic coating to safeguard your shiny, swirl-free surface. A ceramic coating will preserve your paint from the elements while also enhancing its luster and brilliance. To use, simply apply a tiny amount to the desired location, buff it in, then buff it out. It’s that simple. It’s really that easy! Once you’ve completed the entire car, you’ll have no swirl marks to worry about.
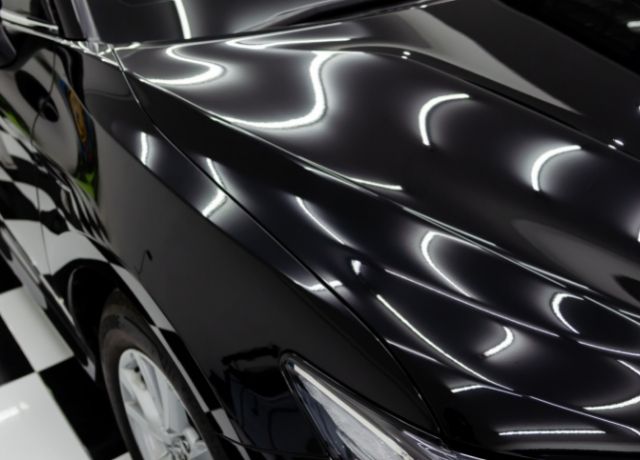
Quick DIY To Fix Swirl Marks On Cars:
Here are several simple do-it-yourself solutions for how to get swirls out of black paint. Use caution while you use these techniques, as they may not be effective in more severe situations. Set realistic goals for yourself.
Polish With Wax:
Wax is an excellent substitute for rubbing alcohol because it has the same effect in terms of eliminating any greasy residue from surfaces. To make things even better, the dye in these waxes helps to seal and protect your car from other potentially toxic substances, which could lead to even more damage in the future..
Use Toothpaste:
Toothpaste has been proven to be one of the best household hacks available, so why not try it on your car?
It’s not a sure thing, but it’s worth a shot if you don’t have the time or resources to put up more advanced approaches.
Use Dish Soap:
One of the best way to remove swirl marks from a black car, use dish soap as a lubricant or as a cleanser. Allow it to sit for around 1 min before wiping the area clean with water. Apply it in circular movements for even distribution.
Use Rubbing Alcohol:
To eliminate the oil accumulation that may be generating swirl marks on car, use rubbing alcohol. In circular movements, rub a microfiber cloth over the paint.
Work from top to bottom (or left to right) to avoid pushing dirt or particles into the scratch!
Rubbing Alcohol With Toothpaste:
If rubbing alcohol isn’t working, add some toothpaste! This will help to build a better barrier and ensure that your paint job is not damaged.
Use A Hairdryer:
The majority of swirls are generated by water that has evaporated into your vehicle’s surface layer. This means it can be eliminated with heat.
For a quick fix, a hot air gun can be used to quickly heat up and dry up the vehicle, but if you don’t have one, a hairdryer will work. Take caution to work in little square pieces at a time to avoid overheating!
Use Dryer Sheets:
Dryer sheets include fabric softener, which can remove difficult smudges and stains from your car’s paint. Simply place a dryer sheet over the selected area and scrub it in circular motions, then rinse away any residue!
Use A Clay Bar:
Many swirls are caused by dirt buildup, which can be cleaned using a clay bar. This is the most extensive and time-consuming procedure of all. However, it is also the greatest way to ensure that your paint job lasts as long as possible.
Use Baking Soda:
Baking soda is superb for eliminating grime from clothes, so why not put it to use to clean your car paint swirls? Pour baking soda on a microfiber cloth and rub in small circles. When you’re finished, rinse the area well!
Use WD-40:
WD-40 mixed with water will help clean away any grime and dirt that may be hindering your car’s attractive paint finish.
How Tto Prevent Car Paint Swirls In The Future?
As previously said, swirl marks on cars are observed commonly that are taken to automatic car washes, thus the easiest way to decrease swirl marks is to avoid the automatic car wash and maintain your vehicle with excellent hand washes more often.
Also, avoid touching your vehicle while it is dry, such as dusting it with a car duster. Likewise, paint swirls on cars can be avoided by waxing and polishing the car on a regular basis. Remember that swirls are produced by dirt, so make sure to clean your vehicle’s surface before polishing!
- Always give your car a thorough cleaning before polishing it.
- If you’re polishing with an electric buffer or machine, make sure to use a polishing pad that’s made for the purpose.
- It is vital to select a low speed while using an electric buffer.
- When removing swirl marks from black paint, always use the chemicals made for the purpose!
Small details like this are the best way to remove swirl marks from a black car.
Conclusion:
You’ve made it this far in the article. Here are a few final words of wisdom on how to get swirl marks out of black paint. It’s easy to eliminate swirl marks on cars if you’ve washed it recently.
Paint swirls can be removed with a swirl remover or by doing a few simple DIY projects using common household items and expert assistance. Make sure to keep in mind that swirl patterns are formed when the dirt is caught between paint layers. Compared to other hues, black paint is more susceptible since it doesn’t reflect light and collects dirt faster.
The best way to remove swirl marks from a black car is to work in circular motions to avoid creating additional scratches if any already exist. Finally, when buffing the product into your paint, ensure that there is no dirt stuck between the machine’s pads (or your fingertips). We hope you found this guide on how to remove swirls from car paint helpful.

