Table of Contents
There’s nothing more frustrating than being stuck in a challenging situation, relying on your winch to pull you to safety, only to find it’s completely unresponsive. That silent winch motor can turn a minor inconvenience into a major crisis. Whether you’re an off-road enthusiast, a boater, or use a winch for industrial applications, understanding how to test a winch motor is an essential skill that can save you time, money, and a lot of headaches. A malfunctioning winch motor doesn’t always mean a costly replacement; often, the issue is minor and can be diagnosed and fixed with some basic knowledge and tools.
This comprehensive guide will walk you through every step of testing your winch motor, from simple beginner-friendly checks to more advanced electrical diagnostics. We’ll demystify the internal components of your winch motor, provide clear, step-by-step testing procedures, and outline common problems with their solutions. By the end of this article, you’ll be equipped with the confidence and knowledge to pinpoint the cause of your winch motor failure and get it back in working order.
Understanding Your Winch Motor and How It Works
Before you start testing, it’s crucial to have a basic understanding of what you’re dealing with. Most winches use a direct current (DC) motor, similar to a car’s starter motor but designed for sustained operation. These motors create rotational force through the interaction of electromagnetic fields.
The key components inside a typical winch motor include:
- Armature: The rotating part of the motor that converts electrical energy into mechanical motion.
- Field Coils: Stationary windings that create a magnetic field to interact with the armature.
- Brushes: Small blocks of conductive material (often carbon) that transfer electrical power to the spinning armature by pressing against the commutator. These are common wear items and a frequent source of failure.
- Commutator: A segmented copper sleeve on the armature that works with the brushes to control the direction of current flow.
When you activate your winch, power from the battery is routed through a control pack (which contains solenoids or a contactor) to the motor. The solenoids act as heavy-duty switches, directing current to make the motor spin in either the IN or OUT direction. Understanding this simple flow of power is the first step to effective troubleshooting.
Essential Safety Precautions Before You Start Testing
Working with winches and high-amperage electrical systems can be dangerous. Your safety is the number one priority. Please read and adhere to these precautions before proceeding.
- Disconnect the Power: Always disconnect the positive lead from your vehicle’s battery before you begin any work on the winch . This prevents accidental activation, which could lead to serious injury or damage.
- Wear Protective Gear: Always wear heavy-duty leather gloves when handling winch rope or cable . Safety glasses are also essential to protect your eyes from sparks or debris.
- Work in a Safe Environment: Ensure your work area is well-ventilated and clear of flammable materials. A winch motor can produce sparks during testing, which could ignite fumes or other combustibles. Keep a fire extinguisher nearby as a precaution .
- Understand the Risks: Never touch the winch rope or cable while it is under tension . Be aware that winch components can become extremely hot during operation. Never engage or disengage the clutch when the winch is under a load .
- Check Your Equipment: Use tools with insulated handles and ensure your testing equipment, like jumper cables and multimeters, is in good condition without any frayed wires or damage .
Preliminary Checks: Ruling Out Simple Problems
Before diving into motor-specific tests, it’s wise to eliminate other common and easily fixable issues that can mimic a motor failure.
- Inspect the Battery: A winch is a power-hungry device. Check that your battery is fully charged and that its terminals are clean and tight. A weak battery can cause slow winch operation or a complete failure to run.
- Check All Connections: Visually inspect the main power and ground cables running from the battery to the winch. Look for corrosion, loose connections, or damaged insulation that could impede electrical flow.
- Listen for a “Click”: When you press the winch control, do you hear a solid “click” from the solenoid box? A click typically means the solenoids are activating, which points the finger of suspicion more toward the motor or the high-current connections. No click at all suggests an issue with the control circuit, remote, or solenoids themselves.
Method 1: The Direct Jumper Cable Test
This is the most straightforward test to determine if your winch motor itself is functional. It bypasses all the vehicle’s wiring and solenoids to send power directly to the motor terminals.
What You’ll Need:
- A known good 12V battery (your vehicle’s battery is fine, just ensure the vehicle is off).
- A set of heavy-duty jumper cables.
- Your heavy-duty leather gloves.
Step-by-Step Instructions:
- Disconnect the Winch: Safely disconnect the main positive and negative cables from your winch motor that lead back to the solenoid pack and battery .
- Locate the Motor Terminals: Identify the three main terminals on the winch motor. They are often labeled “A” (Armature), “F1” (Field 1), and “F2” (Field 2) .
- Set Up for One Direction:
- Take a short, heavy-gauge jumper wire (an 8-gauge cable works well) and create a bridge between terminal “A” and terminal “F1” .
- Attach the negative (black) jumper cable from the battery’s negative terminal to the winch motor’s case or a dedicated ground point.
- Attach the positive (red) jumper cable from the battery’s positive terminal to the “F2” terminal on the motor .
- Observe the Result: The motor should immediately run, spinning the winch drum in one direction (e.g., “IN”). If it does, the motor’s internal components for this direction are good.
- Test the Reverse Direction:
- Observe Again: The motor should now run in the opposite direction (e.g., “OUT”).
Interpreting Your Results:
- Motor runs strongly in both directions: Congratulations! Your winch motor is in good working order. The problem lies elsewhere, likely in the solenoids, wiring, or remote control.
- Motor runs in one direction but not the other: This indicates a problem within the motor, most often with the brushes or the commutator that they contact. It can also point to a specific field coil issue.
- Motor does not run in either direction: The motor has an internal fault. This could be severely worn brushes, a broken wire in the armature or field coils, or a damaged commutator.
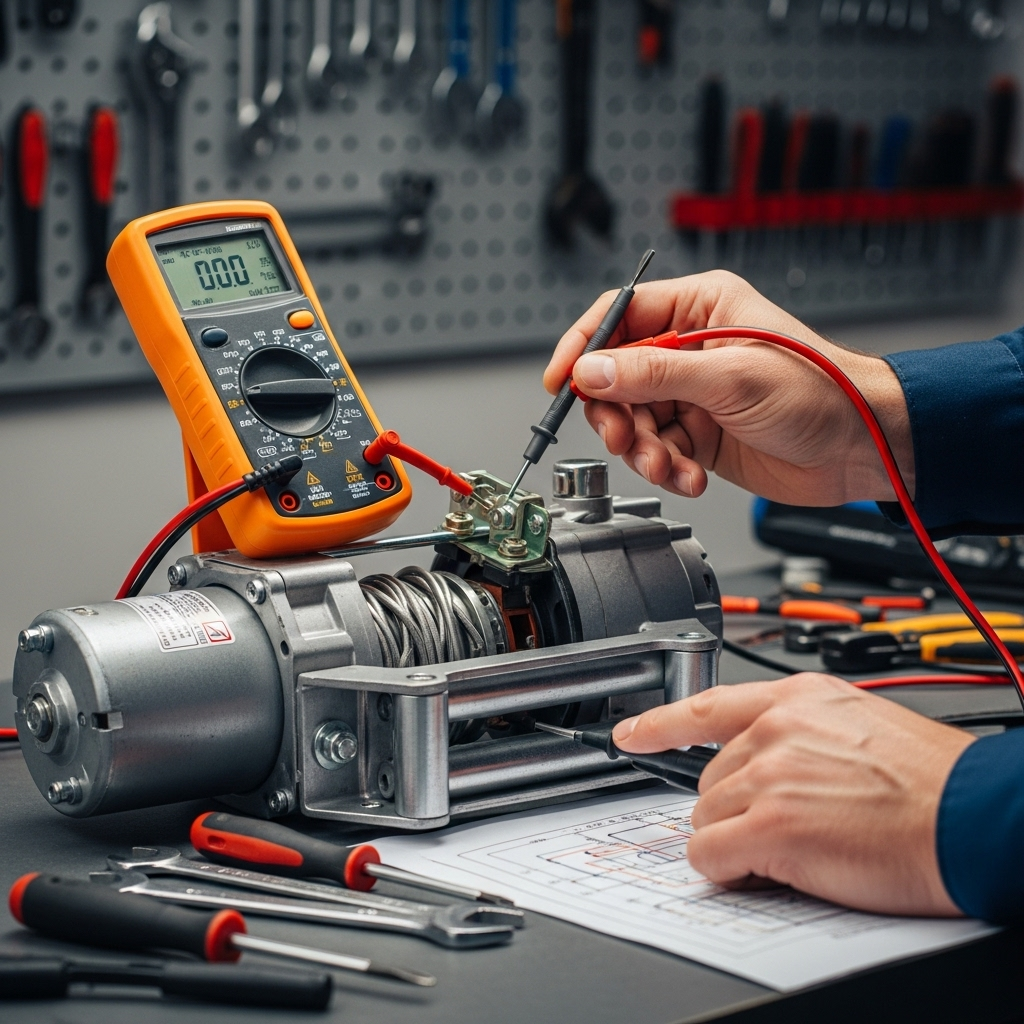
Method 2: The Voltage Drop Test

If the jumper cable test fails, a voltage drop test can help you confirm whether the motor is the problem or if it’s simply not receiving adequate power.
What You’ll Need:
- A digital multimeter (DMM).
Step-by-Step Instructions:
- Reconnect the Winch: Reconnect the winch to its standard wiring and solenoid pack.
- Set Up Your Multimeter: Turn your multimeter to the DC Voltage (VDC) setting, choosing a range that covers at least 12V.
- Test for Power:
- With the winch remote plugged in, have a helper press the control button to activate the winch (ensure the winch is in gear, not freespool, but with no load on the line).
- Carefully touch the multimeter’s black probe to a clean, unpainted metal part of the winch motor (the ground).
- Touch the red probe to each of the main power terminals on the motor one at a time .
- Read the Voltage: A healthy system should show a reading very close to your battery’s voltage (around 12.6V). If the voltage is significantly lower (e.g., 9-10V) or non-existent, it confirms the motor is not receiving sufficient power, pointing to a solenoid, connection, or wiring issue. If the motor receives full voltage but does not run, the motor itself is definitively faulty .
Diagnosing Common Winch Motor Problems
Based on your test results, you can narrow down the likely cause of the failure. The following table summarizes the most common symptoms and their probable causes.
| Symptom | Possible Cause | Solution |
|---|---|---|
| Motor doesn’t run in either direction; no sound. | Severely worn or stuck brushes, broken internal connection, seized armature bearings. | Inspect and replace brushes. Check for internal damage. |
| Motor doesn’t run, but solenoids click. | Bad internal motor connection, worn brushes, poor high-current cable connection between solenoid and motor. | Perform jumper cable test. Check and clean all large cable connections. |
| Motor runs in one direction but not the other. | Faulty solenoid for one direction, worn brushes making poor contact on part of the commutator. | Test solenoids first. If solenoids are good, replace motor brushes. |
| Motor runs very slowly or struggles under light load. | Low battery voltage, corroded or loose cables, worn brushes, damaged armature. | Check battery and connections. Load test battery. Inspect and replace brushes. |
| Motor gets extremely hot very quickly. | Shortened windings inside the motor, excessive friction due to bad bearings. | Often requires motor replacement or professional rebuild. |
| Excessive sparking at the brushes. | Worn brushes, damaged commutator. | Replace brushes. If commutator is scored or dirty, it may need to be cleaned or resurfaced. |
Troubleshooting Specific Scenarios
The Motor Runs in Only One Direction
If your motor passed the jumper cable test for both directions, the motor is fine. The issue is almost certainly in the solenoids (also called the contactor) . One of the two solenoids responsible for reversing the current may be stuck or faulty. The problem could also be a broken wire in the control circuit for that specific solenoid.
The Winch is Very Slow
If your winch operates but is sluggish, the problem is often not the motor itself but the power supply .
- Check the Battery: Ensure the battery is fully charged and holds voltage under load.
- Inspect Cables and Connections: Look for corrosion on terminals, which creates resistance. Even a small amount of resistance can drastically reduce the power reaching the motor.
- Consider Grease: In rare cases, if the wrong type of grease was used in the gearbox or it has thickened with age and contamination, it can place a heavy drag on the motor .
Advanced Testing and Repair: Inspecting and Replacing Brushes
If your diagnostics point to an internal motor fault, the first and most common repair is replacing the brushes.
Disassembly and Inspection:
- Disconnect and Remove: After disconnecting the battery, unbolt the motor from the winch gearbox. This usually involves removing a few bolts around the motor’s perimeter.
- Open the Motor Casing: Carefully open the motor’s outer casing. You may need to remove small screws or simply loosen the long bolts that run the length of the motor.
- Locate the Brushes: Inside, you will find the brush holders, typically two or four of them, with the brushes pressed against the commutator by springs.
- Inspect the Brushes: Remove the brushes from their holders. If they are less than 1/4 inch long, they are worn out and need replacement. Check that they move freely in their holders and are not stuck.
- Inspect the Commutator: Look at the copper commutator on the armature. It should be smooth and clean, not blackened, scored, or pitted. You can clean it lightly with fine sandpaper (not emery cloth) if it’s only dirty.
Replacement and Reassembly:
- Purchase the Correct Brushes: Find a brush replacement kit specific to your winch model.
- Install New Brushes: Insert the new brushes into their holders, ensuring the flexible pigtail wires are securely attached.
- Reassemble the Motor: Carefully put the motor back together, ensuring the brushes are properly seated against the commutator. Reattach the motor to the winch gearbox and reconnect all electrical cables.
When to Seek Professional Help
While many winch motor issues are within a DIYer’s ability to fix, there are times when calling in a professional is the best course of action.
- If you are uncomfortable working with high-amperage electrical systems.
- If you have replaced the brushes and the motor still doesn’t work, indicating a more serious issue like shorted or open windings.
- If the armature or commutator is visibly damaged.
- If the gearbox is making strange noises, indicating potential gear damage separate from the motor.
Preventive Maintenance to Avoid Future Failures
The best way to deal with a winch motor failure is to prevent it from happening in the first place.
- Regularly Run the Winch: Periodically run your winch under light load (e.g., lift your vehicle’s front end slightly off the ground) to keep the motor, brushes, and internal components free of corrosion and functioning smoothly.
- Keep it Clean: After use in mud or water, rinse the winch with fresh water (avoiding high-pressure direct sprays on seals). This prevents corrosive buildup.
- Inspect and Lubricate: Follow your manufacturer’s guidelines for lubricating the gearbox and checking the winch rope or cable for wear.
- Protect Electrical Connections: Use dielectric grease on electrical connectors to prevent corrosion.
Conclusion: Empowering You to Test and Fix Your Winch Motor
Learning how to test a winch motor is a empowering skill that demystifies a critical piece of recovery equipment. By following the systematic approach outlined in this guide—starting with safety, performing the simple jumper cable test, and moving on to more specific diagnostics—you can reliably determine whether the problem is a simple connection, a worn set of brushes, or a more serious motor failure. A non-functioning winch doesn’t have to mean an expensive replacement. Often, it’s a minor issue that you can resolve yourself with basic tools and a methodical process. So the next time your winch falls silent, don’t panic. Grab your gloves and jumper cables, and take the first step toward getting yourself back in action.


JOREST 300Pcs Car Fuse Assortment Kit, 160 Mini Blade Fuses Automotive + 90 Standard Auto Fuses + 50 Micro + Puller – Replacement for RV Camper Boat Truck (2Amp 3A 5A 7.5A 10A 15A 20A 25A 30A 35A 40A)
$9.99 (as of March 27, 2026 09:52 GMT +00:00 - More infoProduct prices and availability are accurate as of the date/time indicated and are subject to change. Any price and availability information displayed on [relevant Amazon Site(s), as applicable] at the time of purchase will apply to the purchase of this product.)


FORTEM Trunk Organizer For SUV Car Trunk Organizer, Foldable Storage, Car Accessories for Women Men, Collapsible Bag, Perfect Christmas Gifts, 600D Oxford, Non Slip Bottom, Straps, Soft Cover (50L)
$23.79 (as of March 27, 2026 09:45 GMT +00:00 - More infoProduct prices and availability are accurate as of the date/time indicated and are subject to change. Any price and availability information displayed on [relevant Amazon Site(s), as applicable] at the time of purchase will apply to the purchase of this product.)


HPBS 5000A Jump Starter with Air Compressor, Portable Car Battery Jump Starter with 150 PSI Tire Inflator for Up to 10.0L Gas and 8.0L Diesel Engines, 12V Jump Box Battery Charger Booster(Red)
$69.99 (as of March 27, 2026 11:24 GMT +00:00 - More infoProduct prices and availability are accurate as of the date/time indicated and are subject to change. Any price and availability information displayed on [relevant Amazon Site(s), as applicable] at the time of purchase will apply to the purchase of this product.)


Crywag Car Wash Foam Gun for Garden Hose, Foam Cannon Car Wash Kit with Microfiber Wash Mitt, High Pressure Nozzle & 3 Spray Modes, Hose Foam Blaster for Cars, Trucks, RV, Motorcycle Cleaning - Blue
$34.99 (as of March 27, 2026 11:30 GMT +00:00 - More infoProduct prices and availability are accurate as of the date/time indicated and are subject to change. Any price and availability information displayed on [relevant Amazon Site(s), as applicable] at the time of purchase will apply to the purchase of this product.)


TuningPros Outside Mount Window Vent Visors Rain Guards Compatible with Toyota Celica 2000-2005 | Side Window Wind Deflectors Rain Shields | Black Tinted, 2 Pcs Set, BGWV-419
$41.51 (as of March 27, 2026 05:03 GMT +00:00 - More infoProduct prices and availability are accurate as of the date/time indicated and are subject to change. Any price and availability information displayed on [relevant Amazon Site(s), as applicable] at the time of purchase will apply to the purchase of this product.)


KUST Windshield Sun Shade for 2017-2026 Tesla Model Y/Model 3 Sunshade Accessories (Fit 2025-2026 Model Y Juniper / 2024 Model 3 Highland) Upgraded Foldable Sunshade, Blocks UV Rays Keep Car Cool
$24.99 (as of March 27, 2026 10:55 GMT +00:00 - More infoProduct prices and availability are accurate as of the date/time indicated and are subject to change. Any price and availability information displayed on [relevant Amazon Site(s), as applicable] at the time of purchase will apply to the purchase of this product.)


IG Window Visors Fit for 2011-2023 Chrysler 300, Out-Channel Rain Guards Vent Wind Deflectors 4PC, Car Accessories for 11-23 Chrysler 300 (Excludes Touring Model)
$37.69 (as of March 27, 2026 09:52 GMT +00:00 - More infoProduct prices and availability are accurate as of the date/time indicated and are subject to change. Any price and availability information displayed on [relevant Amazon Site(s), as applicable] at the time of purchase will apply to the purchase of this product.)


OXO, Blue Good Grips Deep Clean Brush Set
$7.99 (as of March 27, 2026 09:45 GMT +00:00 - More infoProduct prices and availability are accurate as of the date/time indicated and are subject to change. Any price and availability information displayed on [relevant Amazon Site(s), as applicable] at the time of purchase will apply to the purchase of this product.)

Outside Mount Car Window Rain Guards Compatible with Lexus ES330 2002-2006 | Tape-On | Rain Shields Window Visor Window Deflectors | Dark Smoke, 4 Pcs Set, WV2M-704
$34.26 (as of March 27, 2026 04:58 GMT +00:00 - More infoProduct prices and availability are accurate as of the date/time indicated and are subject to change. Any price and availability information displayed on [relevant Amazon Site(s), as applicable] at the time of purchase will apply to the purchase of this product.)