Table of Contents
Learning how to install a winch on a truck is a rite of passage for any off-road enthusiast or anyone who uses their truck for serious work. This single modification dramatically expands your vehicle’s capabilities, transforming it from a mere mode of transport into a powerful recovery tool ready to tackle the toughest situations.
Whether you’re stuck in deep mud, need to pull a fallen tree from a trail, or have to help another vehicle, a properly installed winch is your ultimate insurance policy against getting stranded. This comprehensive guide will walk you through every single step of the process, from selecting the right components to the final safety checks, ensuring you can execute a professional-grade installation with confidence.
A winch installation isn’t just about bolting on a new accessory; it’s about integrating a critical recovery system that must perform flawlessly under extreme stress. Doing the job correctly involves understanding mounting options, electrical requirements, and proper setup procedures.
A haphazard installation can lead to winch failure, vehicle damage, or even personal injury when you need it most. By contrast, a methodical, well-researched approach, as outlined in this guide, will result in a robust and dependable setup that you can trust in any situation. We’ll cover everything from the initial planning stages to the celebratory first test, empowering you to add this vital tool to your truck’s arsenal.
Pre-Installation Planning: Laying the Groundwork for Success
Before you touch a single tool, proper planning is the most critical phase of your winch installation. Rushing this stage leads to frustration, wasted money, and an unsafe final product. A well-planned project ensures compatibility, safety, and performance.
Choosing the Right Winch and Mounting System
Your first decision is selecting a winch with sufficient capacity. The universal rule of thumb is to choose a winch rated for at least 1.5 times your truck’s gross vehicle weight rating (GVWR) . For a heavy-duty truck weighing 6,000 lbs, you should be looking at a minimum 9,000-lb winch. This margin accounts for the increased friction of being stuck in mud or on an incline. Just as important is ensuring your winch mount or bumper is rated to pull at least as much as your winch . A powerful winch is useless if it tears its mount from the frame under load.
You have several primary mounting options, each with its own advantages:
- Aftermarket Steel Bumper: This is the most robust and permanent solution. A high-quality bumper with an integrated winch mount offers superior protection, a clean look, and excellent weather protection for the winch . These often come with pre-drilled holes for a straightforward installation.
- Winch Plate (or Mounting Plate): This is a heavy-duty plate, typically made of 1/4-inch steel, that allows you to mount a winch behind or onto your factory bumper . This is a great option for those who want to maintain the stock look of their truck.
- Hitch Receiver Mount: This system involves mounting the winch on a cradle that slides into a front or rear hitch receiver . The key advantage is versatility; you can move the winch from the front to the rear of the truck or even between vehicles. Crucially, you must ensure your hitch receiver is rated to handle the winch’s load .
Finally, you must check for physical compatibility. Most winches for off-road use share a common 10×4.5-inch bolt pattern, but this can vary . Before purchasing, confirm that your chosen winch fits the bolt pattern of your bumper or mounting plate and that there is adequate clearance for the drum and motor .
Gathering Your Tools and Materials
Being prepared with the right tools will make the installation process smooth and efficient. Here is a comprehensive list of what you’ll need:
Essential Tools:
- Socket wrench set with various sockets, ratchets, and extensions
- Torque wrench (critical for proper bolt tightening)
- Standard wrenches
- Drill with assorted drill bits (for creating new holes if necessary)
- Screwdrivers
- Pliers and wire cutters/strippers
- Angle grinder (for modifications, if needed)
- Level (to ensure proper alignment)
Safety and Installation Materials:
- Heavy-duty work gloves
- Safety glasses
- Electrical tape or heat shrink tubing
- Wire loom or corrugated tubing (for protecting cables)
- Zip ties
- Anti-seize compound (to protect bolt threads from corrosion)
- Primer or touch-up paint (for protecting any drilled bare metal)
Step-by-Step Winch Installation Guide

With your planning complete and tools gathered, you’re ready to begin the physical installation. Follow these steps methodically for a safe and secure result.
Step 1: Mounting the Winch
The physical mounting of the winch is the foundation of your entire installation.
- Prepare the Mounting Location: If you are using a winch plate or aftermarket bumper, you may need to remove the factory bumper or grille to gain access. For a truck bed installation, clear the bed and carefully mark your drilling points after checking the underside for hidden wires or frame members .
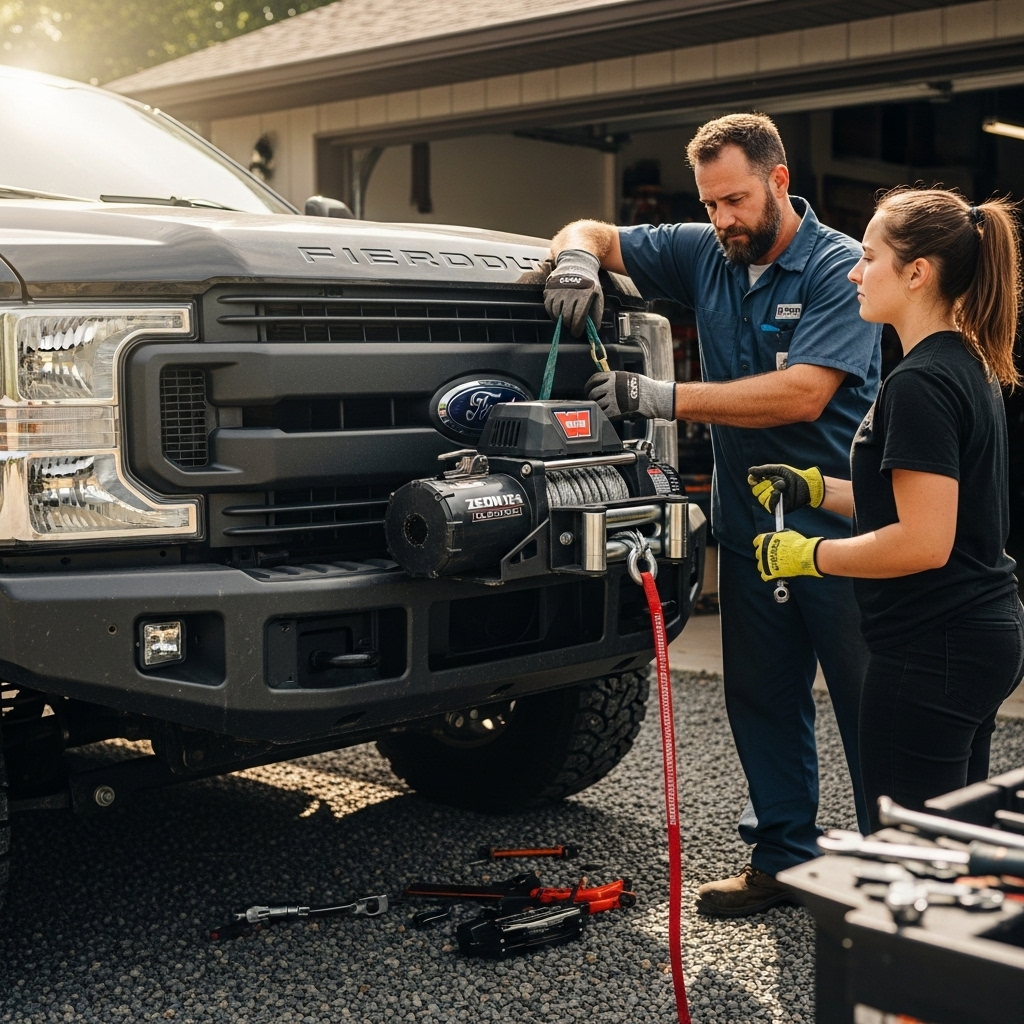
- Position and Secure the Winch: Carefully lift the winch—remember, it can weigh 65-90 pounds—and position it onto the mounting plate or bumper. Align all the bolt holes. A pro tip is to use a little painter’s tape to hold washers in place while you start threading the bolts, preventing them from falling into hard-to-reach places .
- Install the Fairlead: The fairlead guides the winch rope and prevents damage. Bolt the fairlead to your bumper or mount before fully securing the winch, as space may be too tight afterward . Remember: use a roller fairlead for steel cable and a smooth hawse fairlead for synthetic rope to prevent fraying .
- Final Torque: Using your torque wrench, tighten all mounting bolts to the manufacturer’s specifications, typically in the range of 30-35 ft-lbs for the winch itself . Do not guess this step; proper torque is critical for safety.
Step 2: Electrical Wiring and Connections
The electrical installation demands careful attention to detail. Faulty wiring can lead to poor performance, electrical fires, or being stranded with a dead winch.
- Route the Cables: Plan the safest path for the large power cables from the winch to the battery. This route should be as short as possible and must avoid sharp edges, hot surfaces (like exhaust manifolds), and moving parts . Use split loom or corrugated tubing to protect the wires from abrasion and secure them to the frame or other existing wiring harnesses with zip ties every 6-12 inches .
- Connect to the Battery: The heavy-gauge red (positive) cable must connect directly to the battery’s positive terminal. The black (negative) cable connects directly to the negative terminal . Do not connect to secondary posts or other points in the electrical system, as they cannot handle the immense amperage a winch draws under load . For a clean and secure connection, consider upgrading to military-style battery terminals, which have extra bolts specifically for accessories .
- Install In-Line Protection: It is a critical safety practice to install a fuse or circuit breaker on the positive line as close to the battery as possible. This protects your vehicle’s entire electrical system from a potential short circuit in the winch wiring .
- Solenoid/Control Box: Mount the solenoid box (the winch’s electrical control unit) in a location that is relatively protected from direct water and mud splash. Connect the control wires between the solenoid and the winch motor as per the manufacturer’s diagram.
Table: Winch Cable and Electrical Specifications
Step 3: Final Assembly and System Testing
You’re in the home stretch. Now it’s time to set up the winch line and verify everything works perfectly.
- Attach the Winch Line: If not pre-spooled, you need to attach the cable or synthetic rope to the drum. Feed the end of the line through the fairlead and back to the drum. Most winches use an eyelet and bolt or a loop-and-key system to secure the line to the drum . Ensure this connection is very secure.
- Spooling Under Tension: This is a non-negotiable step for a functional winch. Never use a winch straight out of the box without tension-spooling first .
- Disengage the clutch and unspool the line, leaving 5-8 wraps on the drum.
- Pull the line straight out and attach the hook to a solid, immovable object (like another vehicle or a tree, using a tree strap for protection).
- Re-engage the clutch. With your truck’s engine running to keep the battery charged, put the vehicle in park and apply slight pressure on the parking brake to create resistance.
- Slowly winch in the line, using a gloved hand to guide it back and forth so it spools evenly and tightly across the drum . This prevents the line from being pinched and damaged under future heavy loads.
- Final Functional Test: Before you need the winch in an emergency, perform a complete test. Check that the winch powers in and out smoothly using the remote control. Double-check that all mounting bolts are tight and electrical connections are secure.
Troubleshooting Common Installation Issues
Even with careful planning, you might encounter minor issues. Here’s how to address common problems:
- Winch Doesn’t Power On: Double-check all battery connections, ensuring they are tight and free of corrosion. Verify that any in-line fuse or circuit breaker is intact and properly installed .
- Solenoid Clicks but Winch Doesn’t Turn: This often indicates a poor ground connection. Check the ground connection at the battery and the winch itself. Also, ensure the battery has a full charge, as a weak battery can cause this symptom.
- Winch Line Spools Unevenly: This is typically resolved by re-spooling under load as described above. Always guide the line onto the drum evenly during operation.
Safety Considerations and Best Practices
A winch is a powerful tool that demands respect. Adhering to these safety rules is paramount.
- Wear Heavy-Duty Gloves: Always protect your hands. Synthetic rope can cause friction burns, and steel cable can develop sharp, broken wires that act like razors .
- Never Handle a Moving Line: Keep your hands and body clear of the fairlead and the drum when the winch is under power. A snapped cable or a hook letting go can be lethal. Use a hook strap or a dampener on the line .
- Use a Remote Control Safely: Stand to the side, not in line with the winch cable, when operating it. This keeps you out of the “line of fire” if something fails.
- Regular Inspections: Periodically check your winch for loose bolts, signs of corrosion, and wear on the cable or synthetic rope. A quick inspection before a trip can prevent a failure on the trail.
Conclusion: Your Truck, Transformed
Successfully learning how to install a winch on a truck is an empowering achievement that elevates your vehicle’s purpose and your own self-reliance. You’ve added more than just a piece of hardware; you’ve integrated a powerful recovery system that provides the confidence to explore further and handle challenging situations. From the crucial planning stages—selecting the right winch capacity and a mount rated to handle it—to the meticulous process of bolting, wiring, and the essential tension-spooling, you’ve built a system you can trust.
Remember that your responsibility doesn’t end with the installation. Consistent safety practices, like always wearing gloves and staying clear of the tensioned line, along with regular maintenance checks, will ensure your winch remains a dependable partner for years of adventures to come. Now, with your new winch securely installed, you’re ready to tackle the trails with greater confidence and capability.

