Table of Contents
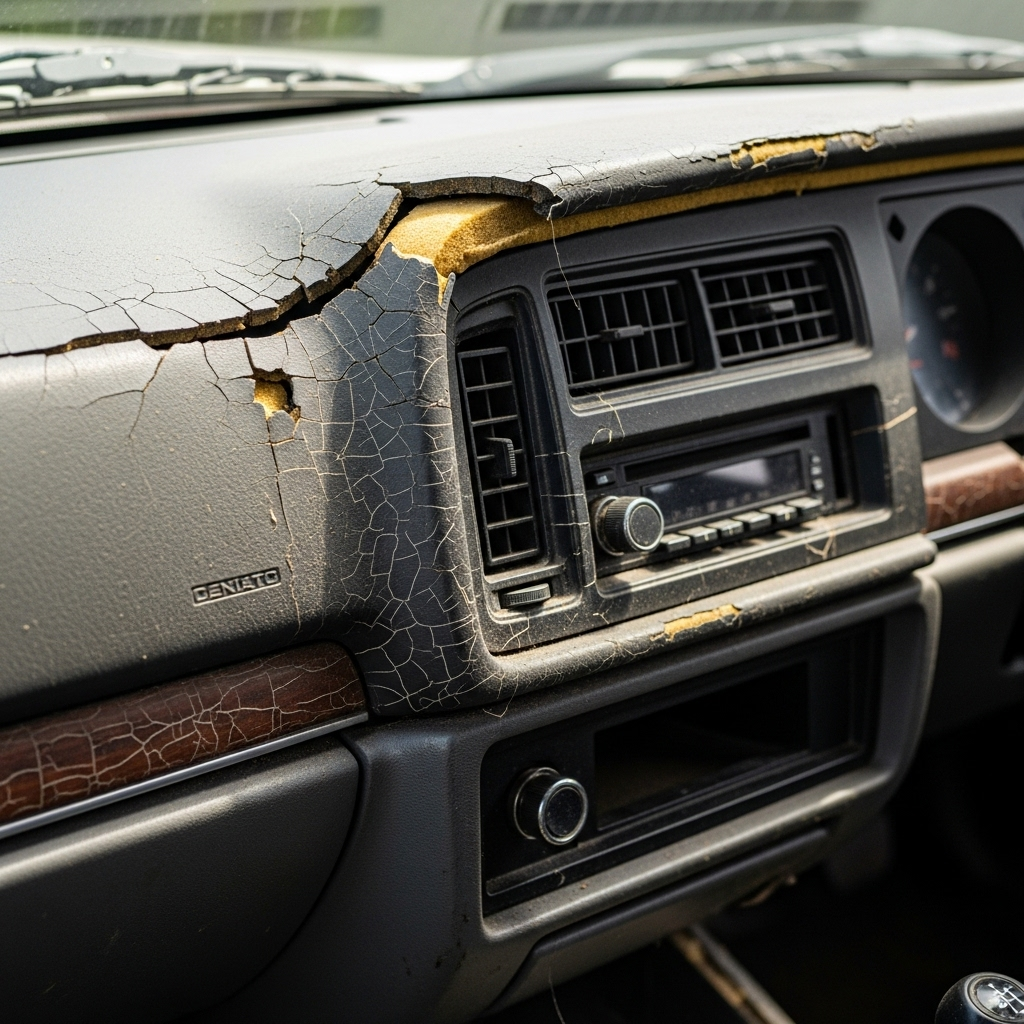
That unsightly gap appearing at the top of your dashboard is more than just a cosmetic issue—it’s a sign of a common problem known as dashboard lift, and addressing it promptly can save you from more extensive damage. If you’re wondering how to fix dashboard coming up, you’ve come to the right place. This comprehensive guide will walk you through every aspect of diagnosing, repairing, and preventing a lifting dashboard, giving you the knowledge to restore your vehicle’s interior safely and effectively.
A lifting dashboard typically occurs when the adhesive securing the dashboard’s vinyl or plastic skin to its underlying substrate fails, often accelerated by prolonged exposure to heat and UV rays. This comprehensive guide provides detailed, step-by-step solutions ranging from simple temporary fixes to professional-level repairs, ensuring you can tackle this problem with confidence no matter your skill level or budget.
What Causes a Dashboard to Lift or Come Up?
Understanding the root causes of dashboard lift is the first step toward an effective and lasting repair. Several factors contribute to this frustrating issue, with most being environmental.
Heat and UV Radiation Exposure are the primary culprits. Your car’s interior can reach extreme temperatures, often exceeding 140°F (60°C) on a sunny day. This intense heat, combined with ultraviolet rays from the sun, bakes the dashboard material, causing the plasticizers in the vinyl to break down and become brittle. Over time, the adhesive layer that bonds the dashboard’s top skin to its foam or plastic core degrades, loses its grip, and the dashboard begins to warp, bubble, or lift away from the base. This process is often called a “sticky dash” in its early stages, which can progress to cracking and full separation.
Poor-Quality Adhesives used by manufacturers can also be a factor. To cut costs, some automakers may have used adhesives that cannot withstand long-term thermal cycling. This leads to premature failure, a problem that has affected many vehicles from the 1980s through the early 2000s.
Physical Stress and Age play a role as well. Like any material, a dashboard has a finite lifespan. Daily temperature fluctuations cause the dashboard materials to expand and contract slightly. After years or decades of this cycle, the materials simply fatigue. Additionally, placing heavy objects on the dash or pressing on it can stress the already weakened adhesive bonds, accelerating the lifting process.
Assessing the Damage: What Kind of Lift Are You Dealing With?
Before you grab your tools, you need to understand the exact nature of the problem. The best repair method depends heavily on the type and severity of the damage.
Minor Lifting or Bubbling is characterized by a small section of the dashboard surface—usually in the center near the windshield—beginning to separate from the base. The material may feel soft or spongy when pressed, but there are no cracks or tears. This is the easiest and most successful type of problem to repair yourself.
Severe Lifting or Full Separation occurs when a large section of the dashboard skin has completely detached from the underlying structure. You may be able to lift the edge several inches, and you can likely see the foam or hard substrate underneath. This often requires more intensive repair methods or even full dashboard replacement.
Lifting Accompanied by Cracking is the most challenging scenario. Here, the dashboard has not only lifted but the vinyl or plastic has become so brittle that it has cracked. This requires a multi-step approach: re-adhering the lifted section and then repairing the cracks, which is a more complex process.
Table: Dashboard Damage Assessment Guide
| Damage Type | Description | Recommended Repair Approach |
|---|---|---|
| Minor Bubbling | Small spongy area, no cracks, surface intact | Surface preparation and adhesive reattachment |
| Edge Lifting | Dashboard edge has separated, material is pliable | Cleaning, adhesive injection, and clamping |
| Full Section Lift | Large area detached, but material is not cracked | Extensive adhesive application and weighted clamping |
| Lift with Cracks | Material is separated and has torn or cracked | Filling cracks with epoxy/putty followed by re-adhesion |
Safety First: Precautions Before You Begin
Working on your dashboard requires careful attention to safety to protect both yourself and your vehicle’s interior.
- Work in a Well-Ventilated Area: Many adhesives, cleaners, and paints emit strong fumes. Always keep your car doors open or work in a garage with the door raised to ensure adequate airflow.
- Disconnect the Battery: Before starting any work, disconnect the negative terminal of your car battery. This prevents accidental short circuits if your tools come into contact with wiring behind the dashboard and disables airbags, which is a critical safety measure.
- Use Personal Protective Equipment (PPE):
- Gloves: Wear nitrile or latex gloves to protect your hands from adhesives and chemicals.
- Safety Glasses: Protect your eyes from accidental drips of glue or debris during cleaning or sanding.
- Dust Mask: A basic dust mask is essential if you are sanding any part of the dashboard to avoid inhaling fine particles.
- Protect Your Vehicle’s Interior: Cover your windshield, seats, and center console with plastic sheeting or drop cloths. Adhesives, paints, and fillers can cause permanent damage to glass and upholstery.
How to Fix Dashboard Coming Up: Repair Method Overview
The right repair method depends entirely on the extent of the damage. The following flowchart will help you quickly determine the best path forward for your specific situation.
Repair Method 1: Simple Adhesive Reattachment for Minor Lifting
This method is ideal for small bubbles or sections where the edge has just begun to peel up, and the material is still flexible.
Materials and Tools Needed:
- High-strength automotive trim adhesive or flexible epoxy
- Rubbing alcohol or ammonia-based cleaner
- Syringe or small plastic spreader
- Clamps or heavy weights (like sandbags)
- Wooden block or firm foam block
- Microfiber cloths
Step-by-Step Process:
Step 1: Clean the Underside and Substrate
Thorough cleaning is the most critical step for a strong bond. Gently lift the detached section just enough to access the underside. Use a microfiber cloth and rubbing alcohol to meticulously clean both the underside of the lifted vinyl and the exposed substrate it was attached to. You may need to repeat this process several times to remove all traces of old, failed adhesive and any grease or dust. Allow the alcohol to evaporate completely .
Step 2: Apply the Adhesive
Using a syringe, carefully inject a high-quality automotive adhesive under the lifted area. If you can’t use a syringe, apply the adhesive to a thin piece of cardboard and gently slide it underneath to spread it. Avoid using excessive amounts, as it can squeeze out and create a mess. Your goal is a thin, even layer across the entire bonding surface.
Step 3: Re-attach and Clamp the Section
Press the lifted section firmly back into place. To distribute pressure evenly and prevent denting the dashboard, place a wooden block or a stiff foam pad over the repaired area. Then, use a clamp to secure the block down onto the dashboard. If the location is not suitable for clamping, use a heavy weight like a sandbag. Ensure the pressure is firm but not so heavy that it distorts the dashboard shape .
Step 4: Curing and Clean-up
Follow the adhesive manufacturer’s instructions for curing time. This can range from a few hours to a full day. Do not disturb the repair during this time. Once fully cured, carefully remove the clamps and weights. If any adhesive has squeezed out, carefully clean it with a cloth dampened with the recommended solvent (often rubbing alcohol) before it fully hardens.
Repair Method 2: Weighted Clamping for Larger Lifted Sections
When a significant portion of the dashboard has lifted, you need a method that ensures full contact across a wide area.
Materials and Tools Needed:
- Automotive headliner or trim adhesive (high-strength aerosol spray adhesive works well)
- Rubbing alcohol and cleaner
- Plastic sheeting and painter’s tape
- Sandbags or multiple heavy weights
- Firm, large foam blocks
Step-by-Step Process:
Step 1: Extensive Cleaning and Masking
Lift the large detached section as much as possible without forcing it. Clean both bonding surfaces thoroughly with rubbing alcohol. Because you will be using spray adhesive, it is crucial to protect the rest of your car’s interior. Use plastic sheeting and painter’s tape to mask off the windshield, vents, and the entire area around the repair site.
Step 2: Apply Spray Adhesive
Shake the can of spray adhesive well. Apply a thin, even coat to both the exposed substrate and the underside of the lifted dashboard skin. Follow the can’s instructions for “open time”—the time you must wait before joining the surfaces. This is typically 3-5 minutes, allowing the adhesive to become tacky.
Step 3: Position and Apply Weight
Carefully lay the dashboard skin back into its original position. Immediately place large foam blocks over the entire repaired section to distribute pressure. Then, strategically place several sandbags or other heavy weights on top of the foam. Ensure the entire lifted area is under consistent, firm pressure.
Step 4: Extended Curing Time
Leave the weights in place for at least 24 hours to allow the adhesive to achieve its full bond strength. Avoid driving the car during this time, as movement can compromise the bond before it’s fully set.
Repair Method 3: Repairing a Dashboard That is Lifting and Cracked
When the lifted material is also cracked, you must fill and reinforce the crack before you can re-adhere the section.
Materials and Tools Needed:
- Flexible epoxy filler or moldable glue
- Fine-grit sandpaper
- Rubbing alcohol
- Putty knife or spreader
- Materials for Method 1 (for re-adhesion after crack repair)
Step-by-Step Process:
Step 1: Prepare the Crack
For a crack that has opened up due to lifting, you may need to widen it slightly into a “V” shape using a rotary tool or sandpaper. This creates a larger surface area for the filler to grip, resulting in a stronger repair. Clean the crack meticulously with rubbing alcohol to remove all debris .
Step 2: Fill the Crack with Epoxy or Moldable Glue
Mix a two-part flexible epoxy filler according to the package directions. Using a putty knife, press the filler firmly into the crack, ensuring it penetrates deeply. Smooth the surface so the filler is slightly proud of the dashboard surface. For smaller cracks, moldable glue can be kneaded and pressed into the gap. Allow the filler to cure completely as per the manufacturer’s instructions; this can take several hours .
Step 3: Sand the Repair Smooth
Once the filler is fully hardened, use fine-grit sandpaper to sand it down until it is perfectly level and smooth with the surrounding dashboard surface. Clean away all sanding dust with a damp cloth .
Step 4: Re-attach the Lifted Section
Now that the crack is repaired, the dashboard section may still be lifted. Follow the steps outlined in Method 1 or Method 2 above to clean the bonding surfaces, apply adhesive, and clamp or weight the section down until the adhesive cures.
Alternative Solutions: When Repair Isn’t Feasible
For some, a DIY repair may not be the right choice. If the damage is too extensive, or you want a guaranteed professional finish, consider these alternatives.
Dashboard Overlays or Caps
A dashboard overlay, also known as a dash cap, is a precision-molded shell that fits directly over your existing dashboard, covering all damage. Installation typically involves smoothing any high spots on the old dash and then attaching the cap with a strong silicone adhesive, often using tape to hold it in place while the adhesive cures. This is a permanent solution that completely transforms the interior look without the high cost of a full replacement .
Professional Dashboard Replacement
For the most severe cases, or for cars where you require a perfect, factory-original appearance, a full dashboard replacement is the ultimate solution. This is a complex and expensive job that involves a mechanic removing the entire old dashboard and installing a new one. The cost can run into the thousands of dollars when factoring in both parts and labor .
Preventative Maintenance: How to Keep Your Dashboard from Lifting Again
Once you’ve repaired your dashboard, protect your investment with these simple practices.
- Use a Sunshade: Whenever your car is parked in the sun, use a reflective sunshade in the windshield. This is the single most effective way to reduce the interior temperature and protect your dashboard from UV rays.
- Apply a UV Protectant: Regularly use a high-quality automotive interior protectant that contains UV inhibitors. Apply it to the entire dashboard surface to help keep the vinyl pliable and resistant to sun damage.
- Park in the Shade or Garage: Whenever possible, park your car in a garage or in a shaded area to minimize its exposure to direct sunlight.
- Avoid Glue-Based Repairs: Using super glue or other hard, non-flexible adhesives for temporary fixes can create stress points and lead to cracking. Always use adhesives designed for flexible automotive interiors.
Final Verdict: How to Fix Dashboard Coming Up
A lifting dashboard is a common but fixable problem. The best method for you depends on the damage severity:
- For small lifts and bubbles, a simple adhesive reattachment is a cost-effective and durable DIY solution.
- For larger lifted sections, a weighted clamping repair with spray adhesive will restore a seamless look.
- For complex cases involving cracks, a combination of epoxy filling and adhesive reattachment will be necessary.
By accurately assessing the damage, choosing the right materials, and following the step-by-step processes outlined in this guide, you can successfully restore your dashboard’s appearance and functionality, significantly enhancing your vehicle’s interior and protecting its value.

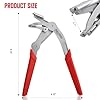
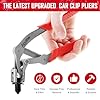
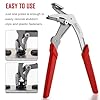

Car Clip Pliers, Panel Clip Removal Pliers, Professional Plastic Fastener Removal Tool for Removing Automotive Fasteners Clips Without Damage
$19.99 (as of April 6, 2026 11:57 GMT +00:00 - More infoProduct prices and availability are accurate as of the date/time indicated and are subject to change. Any price and availability information displayed on [relevant Amazon Site(s), as applicable] at the time of purchase will apply to the purchase of this product.)


for Toyota Tacoma Sun Shade Windshield Cover - Custom Fit Tacoma Accessories 2016-2025 2026 Sunshade Foldable UV Protection & Heat Shield Sun Visor Accessories
$16.89 (as of April 6, 2026 11:50 GMT +00:00 - More infoProduct prices and availability are accurate as of the date/time indicated and are subject to change. Any price and availability information displayed on [relevant Amazon Site(s), as applicable] at the time of purchase will apply to the purchase of this product.)


3M 2080 Series G12 Gloss Black - 5ft x 1ft - 5sq ft - Dual Cast Thick Vinyl Car Wrapping Film - Bubble Free Vehicle Sheet Roll
$20.99 (as of April 6, 2026 05:38 GMT +00:00 - More infoProduct prices and availability are accurate as of the date/time indicated and are subject to change. Any price and availability information displayed on [relevant Amazon Site(s), as applicable] at the time of purchase will apply to the purchase of this product.)


3M Car Wrap Roll 2080 Gloss Black | G12 | (Sample 3in x 5in) | Automotive Vinyl Wrap for Cars - Car Interior Wrap & Exterior
$1.49 (as of April 6, 2026 05:18 GMT +00:00 - More infoProduct prices and availability are accurate as of the date/time indicated and are subject to change. Any price and availability information displayed on [relevant Amazon Site(s), as applicable] at the time of purchase will apply to the purchase of this product.)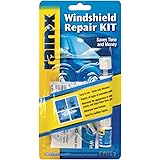


Rain-X 600001 Windshield Repair Kit - Quick and Easy Durable Resin Based Windshield Repair Kit for Chips and Cracks, Good for Round Damage Below 1" in Diameter and Cracks Smaller Than 12" in Length
$12.67 (as of April 6, 2026 10:36 GMT +00:00 - More infoProduct prices and availability are accurate as of the date/time indicated and are subject to change. Any price and availability information displayed on [relevant Amazon Site(s), as applicable] at the time of purchase will apply to the purchase of this product.)


CERAKOTE® Ceramic Headlight Restoration Kit – Guaranteed To Last As Long As You Own Your Vehicle – Brings Headlights Back to Like New Condition - No Power Tools Required - 10 Wipe Kit
$17.95 (as of April 6, 2026 11:25 GMT +00:00 - More infoProduct prices and availability are accurate as of the date/time indicated and are subject to change. Any price and availability information displayed on [relevant Amazon Site(s), as applicable] at the time of purchase will apply to the purchase of this product.)


Detroit Axle - Front Sway Bars for Chevy Silverado GMC Sierra Yukon XL Avalanche Suburban 1500 2500 3500 HD Astro Safari, 2 Sway Bar End Links Pair Set Replacement
$25.89 (as of April 6, 2026 05:17 GMT +00:00 - More infoProduct prices and availability are accurate as of the date/time indicated and are subject to change. Any price and availability information displayed on [relevant Amazon Site(s), as applicable] at the time of purchase will apply to the purchase of this product.)
![Wigoo 2026 Tesla Model 3 Sunshade Roof [Never Sag, Nano Ice-Crystal Coatings] Heat Reflective Glass Roof Sun Shade, Accessories for Tesla Model 3 2020~2026, Tesla Interior Black #1](https://m.media-amazon.com/images/I/415A6hagsRL._SL100_.jpg)
![Wigoo 2026 Tesla Model 3 Sunshade Roof [Never Sag, Nano Ice-Crystal Coatings] Heat Reflective Glass Roof Sun Shade, Accessories for Tesla Model 3 2020~2026, Tesla Interior Black #2](https://m.media-amazon.com/images/I/41XNak+rpFL._SL100_.jpg)
![Wigoo 2026 Tesla Model 3 Sunshade Roof [Never Sag, Nano Ice-Crystal Coatings] Heat Reflective Glass Roof Sun Shade, Accessories for Tesla Model 3 2020~2026, Tesla Interior Black #3](https://m.media-amazon.com/images/I/51Ei26MradL._SL100_.jpg)
![Wigoo 2026 Tesla Model 3 Sunshade Roof [Never Sag, Nano Ice-Crystal Coatings] Heat Reflective Glass Roof Sun Shade, Accessories for Tesla Model 3 2020~2026, Tesla Interior Black #4](https://m.media-amazon.com/images/I/41z0-vYUNRL._SL100_.jpg)
![Wigoo 2026 Tesla Model 3 Sunshade Roof [Never Sag, Nano Ice-Crystal Coatings] Heat Reflective Glass Roof Sun Shade, Accessories for Tesla Model 3 2020~2026, Tesla Interior Black #5](https://m.media-amazon.com/images/I/41KK+Q8ictL._SL100_.jpg)
Wigoo 2026 Tesla Model 3 Sunshade Roof [Never Sag, Nano Ice-Crystal Coatings] Heat Reflective Glass Roof Sun Shade, Accessories for Tesla Model 3 2020~2026, Tesla Interior Black
$42.49 (as of April 6, 2026 10:12 GMT +00:00 - More infoProduct prices and availability are accurate as of the date/time indicated and are subject to change. Any price and availability information displayed on [relevant Amazon Site(s), as applicable] at the time of purchase will apply to the purchase of this product.)

Bell Powersports MX-9 MIPS Motorcycle Helmets
$143.17 (as of April 6, 2026 10:22 GMT +00:00 - More infoProduct prices and availability are accurate as of the date/time indicated and are subject to change. Any price and availability information displayed on [relevant Amazon Site(s), as applicable] at the time of purchase will apply to the purchase of this product.)