Table of Contents
Discovering that your coolant mixing with engine oil is one of the most alarming problems any vehicle owner can face. This serious condition indicates a fundamental failure in your engine’s sealing systems that keeps these vital fluids separate. When coolant contaminates your oil, it creates a destructive mixture that can rapidly lead to catastrophic engine damage if not addressed immediately. Understanding how to properly diagnose, repair, and prevent this issue is crucial for preserving your engine’s health and avoiding repair bills that can run into thousands of dollars. This comprehensive guide will walk you through every aspect of identifying and fixing coolant mixing with engine oil, providing you with the knowledge needed to address this problem effectively whether you’re a DIY enthusiast or need to understand what a mechanic should be doing.
The severity of this issue cannot be overstated. When coolant enters your oil system, it fundamentally changes the oil’s chemical properties, destroying its ability to properly lubricate your engine’s precision components. The result is increased friction, overheating, and potential engine failure within a surprisingly short distance. The key to successful resolution lies in accurate diagnosis, proper repair techniques, and thorough system cleaning to prevent recurring problems.
What Does Coolant in Oil Look Like? Recognizing the Signs
Early detection of coolant contamination in your engine oil dramatically improves repair outcomes and can prevent extensive damage. Watch for these telltale signs that indicate your fluids have mixed:
Milky, Frothy Oil on the Dipstick
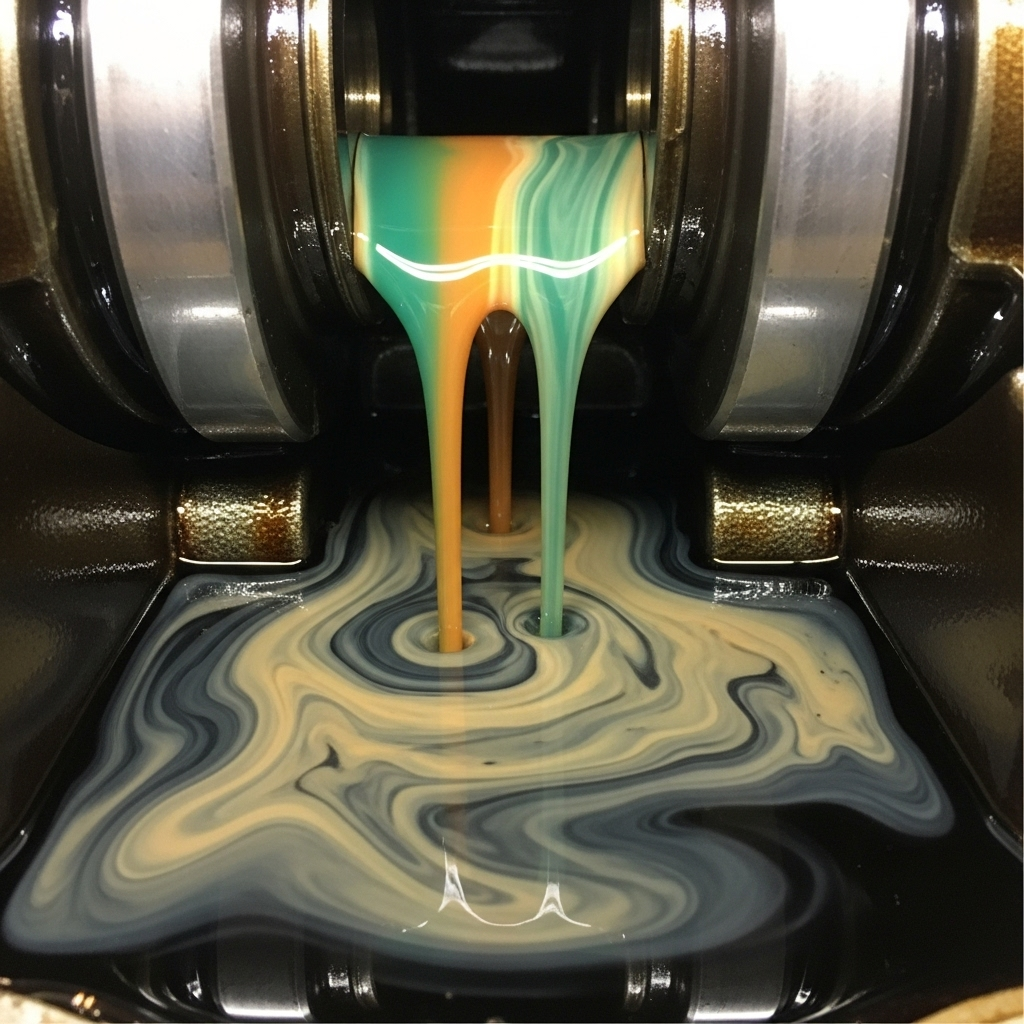
The most recognizable symptom is the transformation of your engine oil from its normal transparent amber or brown color to a thick, milky, light brown substance that resembles a chocolate milkshake . This distinctive appearance occurs because the coolant emulsifies within the oil, creating a frothy consistency that you’ll see on the dipstick when checking your oil level .
White Sludge Under the Oil Cap
Inspect your oil filler cap on the valve cover. If you find a mayonnaise-like, creamy white or tan sludge accumulated underneath, this is another clear indicator of coolant contamination . This emulsion forms as coolant and oil mix in the upper portions of your engine.
Unexplained Coolant Loss Without Visible Leaks
Monitor your coolant reservoir level regularly. If you find yourself needing to add coolant frequently but cannot find any external leaks beneath the vehicle, the coolant may be leaking internally into your engine’s oil passages .
White Exhaust Smoke with Sweet Odor
Noticeable white smoke from your exhaust that has a distinctly sweet smell indicates coolant is entering the combustion chambers and being burned along with fuel . This often accompanies other symptoms of a compromised head gasket.
Engine Overheating Issues
As coolant mixes with oil, both fluids lose their effectiveness. The contaminated coolant cannot properly regulate engine temperature, leading to overheating conditions even when the coolant reservoir appears full .
Oil Level Rising Mysteriously
In some cases, you might notice your oil level appears to be rising on the dipstick rather than decreasing between changes. This occurs because coolant is actively entering the oil system and increasing the total fluid volume .
Table: Visual Guide to Identifying Coolant in Oil
Why Is Coolant Mixing With Engine Oil So Dangerous?

The combination of coolant and engine oil creates a destructive mixture that compromises both fluids’ essential properties and can rapidly destroy your engine:
Loss of Lubrication Properties
Engine oil is specifically formulated to maintain a protective film between metal components moving at high speeds. When coolant contaminates the oil, it dramatically reduces its viscosity and lubricity, resulting in metal-to-metal contact . This increased friction leads to accelerated wear on critical components like bearings, camshafts, and cylinder walls.
Formation of Damaging Sludge
The emulsion created by mixed oil and coolant forms a thick sludge that cannot properly flow through your engine’s oil passages . This sludge accumulates in small oil galleries, blocking lubrication to vital components and potentially starving them of oil entirely.
Acidic Mixture Formation
Coolant contains chemicals that, when mixed with oil and exposed to engine heat, can create acidic compounds . These acids attack bearing surfaces, cylinder walls, and other precision-machined components, leading to pitting and corrosion that further accelerates engine wear.
Cooling System Blockage
When oil enters the cooling system, it can coat internal surfaces of the radiator and coolant passages, acting as an insulator that reduces heat transfer efficiency . This creates a vicious cycle where the engine runs hotter, potentially causing additional damage.
Potential for Catastrophic Engine Failure
The combined effect of poor lubrication, sludge formation, and overheating can lead to complete engine failure. Connecting rod bearings are particularly vulnerable, as they depend on a consistent oil film to prevent seizure . A seized engine typically requires full replacement, representing the most expensive possible outcome.
Common Causes of Coolant Mixing With Oil
To effectively fix the problem, you must first identify the source of the contamination. These are the most common causes, listed from most to least frequent:
Blown Head Gasket
The head gasket serves as a critical seal between the engine block and cylinder head, keeping oil and coolant passages separate while containing combustion pressures . When this gasket fails, it creates passages allowing coolant to flow directly into oil galleries. Overheating is the primary cause of head gasket failure, as extreme heat warps components and compromises the gasket’s sealing ability.
Cracked Cylinder Head or Engine Block
Extreme temperature fluctuations can cause the cylinder head or engine block to develop hairline cracks . These cracks create pathways for coolant to seep into oil passages. This damage often occurs when an engine overheats severely or when coolant freezes in cold climates due to improper antifreeze concentration.
Failed Oil Cooler
Many modern vehicles use an oil cooler to transfer heat from engine oil to the coolant . These devices contain seals and internal components that can fail over time. A leaking oil cooler allows direct mixing of the two fluids, often without other obvious symptoms of head gasket failure.
Intake Manifold Gasket Issues
In some engine designs, the intake manifold carries coolant through passages near oil galleries. A failed intake manifold gasket can permit coolant to enter areas where it can mix with oil, though this is less common than head gasket failures.
Warped Cylinder Head
Severe or repeated overheating can cause the cylinder head to warp, preventing the head gasket from sealing properly even if it’s new . This condition requires resurfacing or replacement of the cylinder head to restore proper sealing.
Table: Comparing Common Causes of Coolant-Oil Mixing
Step-by-Step Guide: How to Fix Coolant Mixing With Engine Oil
Addressing coolant-oil contamination requires methodical diagnosis and careful repair. Follow these steps to properly resolve the issue:
Step 1: Immediate Actions – Preventing Further Damage
When you first suspect coolant and oil are mixing, take these immediate steps to minimize engine damage:
- Stop Driving Immediately: Do not run the engine any more than absolutely necessary. Each minute of operation with contaminated oil causes exponential wear .
- Arrange for Towing: If the vehicle is undriveable, have it towed to your repair facility rather than risking further damage by driving it .
- Document All Symptoms: Note all observable symptoms, when they began, and any recent maintenance or incidents. This information will help with diagnosis .
Step 2: Accurate Diagnosis – Identifying the Source
Proper diagnosis is crucial to avoid unnecessary repairs. Follow these diagnostic procedures:
- Visual Inspection: Check the oil dipstick, filler cap, and coolant reservoir for signs of contamination as described earlier .
- Cooling System Pressure Test: This test pressurizes the cooling system without the engine running to identify leaks. A system that won’t hold pressure indicates a significant leak .
- Combustion Leak Test: A chemical test detects combustion gases in the coolant, confirming head gasket failure .
- Compression Test: This test identifies compression leaks between cylinders, which often accompany head gasket failures that allow coolant into oil .
- Cylinder Leak-Down Test: More precise than a compression test, this identifies where compression is leaking, helping pinpoint the exact failure location.
- Oil Cooler Pressure Test: For vehicles with oil coolers, test the cooler separately to check for internal leaks .
Step 3: Draining and Flushing Contaminated Fluids
Once you’ve identified the source of contamination, thoroughly clean all affected systems:
- Drain Contaminated Oil: Place a drain pan beneath the oil pan, remove the drain plug, and allow all contaminated oil to drain completely .
- Remove and Replace Oil Filter: Always install a new oil filter after contamination .
- Flush the Engine: Use a dedicated engine flush product or inexpensive mineral oil to remove all residual contamination. Run the engine briefly (if safe) with the flush fluid, then drain completely .
- Drain and Flush Cooling System: Open the radiator drain valve and remove all contaminated coolant. Flush the system with water until it runs clear .
- Clean the Coolant Reservoir: Remove and thoroughly clean the coolant overflow tank of any oil residue .
Step 4: Repairing the Root Cause
The specific repair depends on the diagnosed cause:
Head Gasket Replacement
This complex repair requires significant mechanical skill:
- Disassembly: Remove intake and exhaust components, timing system, and all components attached to the cylinder head.
- Cylinder Head Removal: Unbolt and carefully lift off the cylinder head.
- Surface Cleaning: Thoroughly clean all gasket surfaces on both the cylinder head and engine block.
- Inspection: Check the cylinder head for warpage using a straightedge and feeler gauges. Machine the head if it exceeds specifications.
- Reassembly: Install new head gasket (following torque sequence and specifications precisely), reassemble all components.
Cylinder Head Repair or Replacement
For cracked or warped cylinder heads beyond machining specifications:
- Professional Machining: For minor warpage, a machine shop can resurface the head.
- Welding and Repair: Some cracks can be repaired by specialized shops using welding or pinning techniques.
- Replacement: Severely damaged heads should be replaced with new or quality rebuilt units.
Oil Cooler Replacement
For failed oil coolers:
- Locate and remove the oil cooler assembly.
- Replace with a new unit, ensuring all seals are properly installed.
- Test the system after replacement to confirm the leak is resolved.
Engine Block Repair
In cases of cracked engine blocks:
- Professional Assessment: Have a machine shop evaluate whether the block can be repaired.
- Engine Replacement: Often more cost-effective than attempting to repair a cracked block, with replacement engines costing $4,000-$8,000 .
Step 5: Reassembly and System Refilling
After completing repairs:
- Refill with Fresh Oil: Use the manufacturer-recommended type and weight of engine oil .
- Refill Cooling System: Use the proper coolant type, following the manufacturer’s recommended mixture with distilled water .
- Bleed Air from Cooling System: Follow manufacturer procedures to remove air pockets that could cause overheating.
- Start and Check for Leaks: Run the engine, checking carefully for any fluid leaks.
- Recheck Fluids After Warm-Up: Confirm proper oil and coolant levels after the engine has reached operating temperature and cooled.
Step 6: Post-Repair Verification
Confirm the repair has been successful:
- Monitor Fluid Conditions: Check oil and coolant daily for the first week for any signs of recurring contamination.
- Test Drive: Gradually increase driving distance while monitoring engine temperature and performance.
- Follow-Up Inspection: Recheck the vehicle after several hundred miles to confirm no new contamination has occurred.
Cost Breakdown: What to Expect When Fixing Coolant in Oil
Repair costs vary dramatically based on the underlying cause and vehicle type:
- Head Gasket Replacement: $1,500-$2,500 for most vehicles, including parts and labor . Performance and luxury vehicles can exceed $3,000.
- Cylinder Head Repair: $500-$1,500 for machining, plus head gasket replacement costs. Crack repair may cost $300-$600.
- Oil Cooler Replacement: $500-$1,200 depending on vehicle type and cooler accessibility .
- Engine Block Repair: Rarely practical; engine replacement typically costs $4,000-$8,000 .
- Fluid Flush and Cleaning: $200-$400 if performed professionally, plus the cost of the root cause repair.
Labor comprises the majority of these costs, particularly for head gasket replacement which typically requires 6-12 hours depending on engine design complexity.
Prevention Strategies: Avoiding Future Coolant-Oil Mixing
Preventing coolant-oil mixing is significantly more economical than repairs:
- Regular Cooling System Maintenance: Change coolant at manufacturer-recommended intervals using the correct type .
- Address Overheating Immediately: If your engine begins to overheat, diagnose and repair the cause immediately to prevent head gasket damage .
- Use Quality Coolant and Oil: Premium products provide better protection against corrosion and breakdown .
- Regular Oil Changes: Fresh oil maintains proper lubricating properties and helps prevent sludge formation.
- Periodic System Inspections: Have your cooling system pressure tested annually to identify weak points before they fail .
- Proper Warm-Up in Cold Weather: Allow your engine to reach normal operating temperature gradually in extremely cold conditions to reduce thermal stress.
When to Seek Professional Help
While some enthusiasts may attempt head gasket replacement, seek professional assistance in these situations:
- Limited Mechanical Experience: Head gasket replacement is among the most complex DIY repairs.
- Specialized Tools Required: Many modern engines require specific tools for timing component alignment.
- Warranty Considerations: Professional repairs typically include warranties on both parts and labor.
- Suspected Structural Damage: Cracked blocks or heads require professional assessment and repair.
- Continued Issues After Repair: If problems persist after your repair attempt, consult a professional before causing further damage.
Conclusion: Addressing Coolant Mixing With Oil Effectively
Discovering coolant mixing with engine oil is undoubtedly concerning, but with proper diagnosis and methodical repair, the issue can be resolved effectively. The key to success lies in accurate identification of the source, thorough cleaning of all contaminated systems, precise repair of the underlying cause, and verification that the problem has been completely resolved. While the repair may seem daunting, particularly for head gasket issues, understanding the process empowers you to make informed decisions about whether to attempt the repair yourself or enlist professional assistance.
Remember that prompt action when you first notice symptoms can prevent relatively minor issues from escalating into catastrophic engine failure requiring replacement. By following the comprehensive steps outlined in this guide and adhering to proper preventative maintenance practices, you can either successfully repair your engine or knowledgeably work with a professional technician to restore your vehicle to reliable operation.







![Detroit Axle - Rear Shock Absorbers for Chevrolet Silverado GMC Sierra 1500 LD Limited [w/o Electronic Suspension] 2pc Rear Shock Absorbers Assembly Pair Replacement #1](https://m.media-amazon.com/images/I/5175k9exj3L._SL100_.jpg)
![Detroit Axle - Rear Shock Absorbers for Chevrolet Silverado GMC Sierra 1500 LD Limited [w/o Electronic Suspension] 2pc Rear Shock Absorbers Assembly Pair Replacement #2](https://m.media-amazon.com/images/I/51KWNAdZdTL._SL100_.jpg)
![Detroit Axle - Rear Shock Absorbers for Chevrolet Silverado GMC Sierra 1500 LD Limited [w/o Electronic Suspension] 2pc Rear Shock Absorbers Assembly Pair Replacement #3](https://m.media-amazon.com/images/I/31Mcav2d6BL._SL100_.jpg)
![Detroit Axle - Rear Shock Absorbers for Chevrolet Silverado GMC Sierra 1500 LD Limited [w/o Electronic Suspension] 2pc Rear Shock Absorbers Assembly Pair Replacement #4](https://m.media-amazon.com/images/I/31OTqAiBU-L._SL100_.jpg)
![Detroit Axle - Rear Shock Absorbers for Chevrolet Silverado GMC Sierra 1500 LD Limited [w/o Electronic Suspension] 2pc Rear Shock Absorbers Assembly Pair Replacement #5](https://m.media-amazon.com/images/I/31o78glyECL._SL100_.jpg)


