Table of Contents
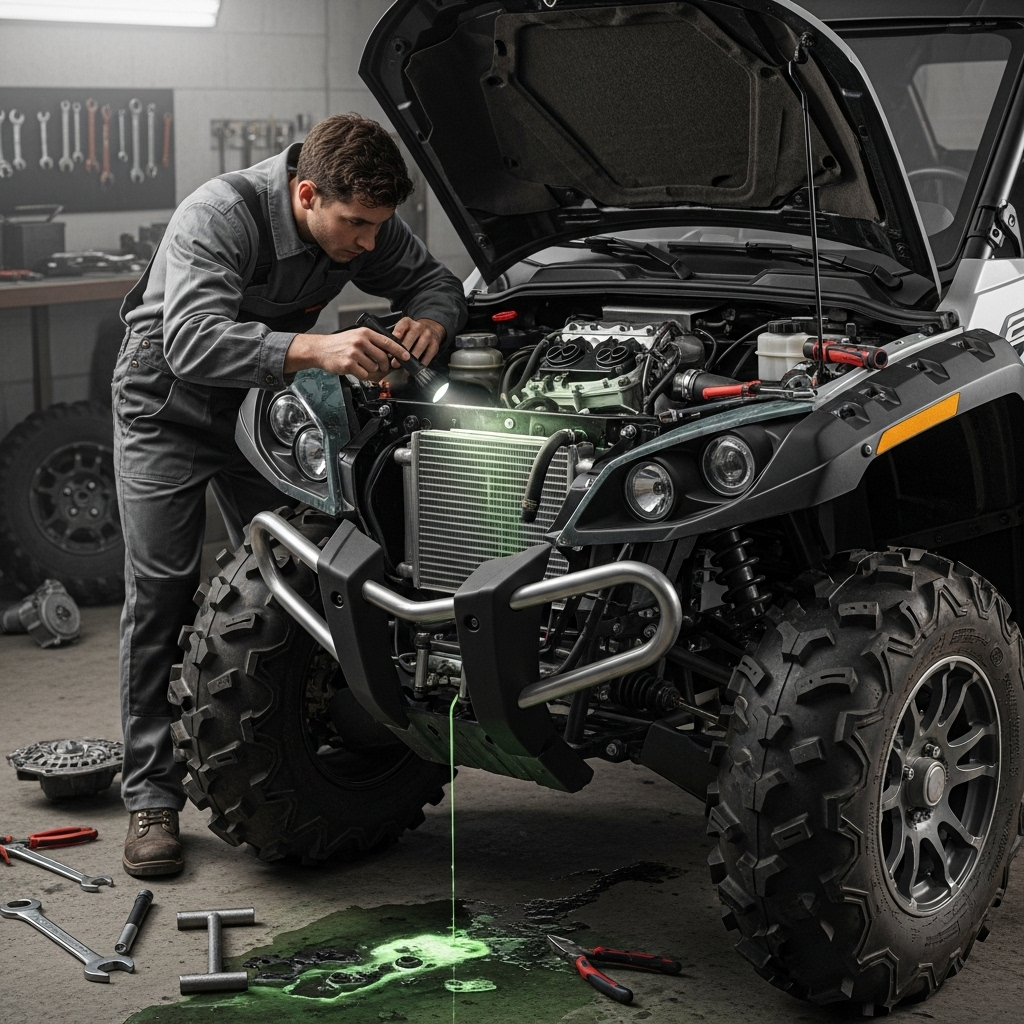
Learning how to fix ATV coolant disappearing leak problems is a critical skill for any rider who wants to avoid the nightmare of an overheated and seized engine out on the trail. That slow, mysterious drop in your coolant reservoir level isn’t just an inconvenience—it’s a warning sign of an underlying issue that, if left unchecked, can lead to catastrophic engine failure. A coolant leak can be a straightforward external drip from a loose hose, but a “disappearing” coolant problem often points to more sinister internal leaks where coolant is secretly entering your engine’s oil system, combustion chambers, or being forced out under pressure due to a compromised head gasket. This comprehensive guide will transform you into a coolant leak detective. We’ll walk you through a systematic approach to diagnose where your coolant is going, provide detailed repair procedures for everything from simple hose replacements to complex head gasket jobs, and offer proven maintenance strategies to prevent future leaks from occurring.
Understanding Your ATV’s Cooling System
Before you can effectively diagnose a coolant leak, it’s essential to understand how the cooling system is supposed to work. The vast majority of modern ATVs use a pressurized liquid-cooling system to manage the immense heat generated by the engine.
The Role of Key Cooling System Components
- The Water Pump: This is the heart of the system. A centrifugal water pump turns to circulate coolant through the engine and to the radiator, ensuring a constant flow that captures heat from the engine block and cylinder head .
- The Radiator: Acting as a heat exchanger, the radiator is usually located at the front of the ATV to maximize airflow. Fins and tubes dissipate the heat from the coolant into the air. If the coolant inside remains too hot, an electric fan activates to pull additional air through the radiator .
- The Thermostat: This component regulates engine temperature. It blocks coolant flow to the radiator when the engine is cold, allowing it to warm up quickly to its normal operating temperature (typically between 85°C and 95°C or 185°F and 203°F). Once the engine reaches temperature, the thermostat opens to allow coolant to flow to the radiator . Running an engine too cool can lead to premature wear.
- The Radiator Cap: This is more than just a plug; it’s a critical pressure-control device. The cooling system operates under pressure (typically around 15 psi) to raise the boiling point of the coolant, preventing it from turning to steam even at temperatures over 105°C (221°F) .
- The Expansion Tank: This reservoir captures coolant that expands as the system heats up. When pressure exceeds the radiator cap’s rating, coolant flows into this tank. As the engine cools, a vacuum is created, and coolant is drawn back into the main system .
When one of these components fails, it can lead to the mysterious disappearance of coolant you’re experiencing.
Common Causes of Coolant Disappearance
A disappearing coolant problem generally falls into one of two categories: visible external leaks or hidden internal leaks. Diagnosing the issue correctly is the first and most crucial step.
External Leaks
These are the easiest to spot, provided you know where to look. Coolant is often brightly colored (green, pink, or orange) and has a sweet smell, which can help you track it down.
- Leaking Hoses and Connections: Over time, radiator and heater hoses can become brittle, cracked, or swollen. The constant clamps that secure them can also loosen due to vibration. Check for white, crusty residue or visible drips at connection points.
- Failed Radiator Cap: A worn-out radiator cap spring cannot hold the system’s designed pressure. This causes the coolant to boil at a lower temperature and be forced out into the overflow tank faster than it can be recovered, leading to gradual loss .
- Radiator Core Damage: The radiator’s fins are vulnerable to damage from rocks, sticks, and debris. Corrosion from within can also create pinhole leaks. A leaking radiator will often show visible wetness or staining on its surface .
- Water Pump Seal Failure: The water pump has a seal that prevents coolant from leaking out along the pump shaft. When this seal fails, you’ll typically see coolant “weeping” from a small hole in the pump housing or notice crusty residue in that area .
Internal Leaks (The “Silent” Coolant Loss)
These are the causes behind a true “disappearing” coolant issue, as the coolant is leaving the system but you can’t see it on the ground.
- Blown Head Gasket: This is one of the most common and serious causes of internal coolant loss. The head gasket seals the cylinder head to the engine block. If it fails between a coolant passage and the cylinder, coolant can be sucked into the combustion chamber and burned away as white, sweet-smelling exhaust smoke. If it fails between a coolant passage and an oil gallery, coolant will contaminate your engine oil .
- Cracked or Warped Cylinder Head: Extreme overheating can cause the cylinder head itself to warp or develop hairline cracks. This creates a path for coolant to enter the cylinders or oil system, mimicking the symptoms of a blown head gasket. Warping can sometimes be machined flat, but cracks usually require cylinder head replacement .
- Leaking Frost Plugs: Also known as freeze plugs, these are metal discs installed in the engine block. While their primary purpose is not to plug leaks, they can corrode or be pushed out if coolant freezes. A leaking frost plug inside the engine can allow coolant to drip directly into the oil pan .
Table: Symptoms and Common Causes of Coolant Loss
Step-by-Step Diagnostic Process

Follow this systematic approach to pinpoint exactly where your coolant is going.
Step 1: The Visual Inspection
Start with the simplest checks first. With the engine cold, carefully inspect the entire cooling system.
- Check Hoses and Clamps: Look for cracks, bulges, and soft spots in all hoses. Ensure all clamps are tight and positioned correctly.
- Inspect the Radiator: Look for bent fins, signs of impact, or green/orange residue that indicates a leak. Check the radiator seams for cracks.
- Examine the Water Pump: Look for the “weep hole” on the bottom of the water pump housing. Any sign of coolant leakage here means the internal seal has failed .
- Look for Frost Plugs: On the engine block, check if any frost plugs are visibly rusty or leaking .
Step 2: Check for Internal Engine Leaks
If the visual inspection reveals nothing, it’s time to look for internal leaks.
- Inspect the Engine Oil: Remove the dipstick and look at the oil. If it appears milky, frothy, or has a tan, coffee-with-cream color, this is a definitive sign that coolant is mixing with your oil. This points to a blown head gasket or a cracked head .
- Monitor Exhaust Smoke: Start the engine and let it warm up. Look at the exhaust. A large amount of thick, white smoke that has a sweet smell indicates that coolant is likely being burned in the combustion chamber .
- Perform a Pressure Test: This is the most definitive test for leak detection. A cooling system pressure test kit attaches to your radiator fill neck. You then pump it to pressurize the system to the cap’s rated pressure (e.g., 15 psi). If the pressure drops over time, you have a leak. You can then use the tester to help locate the source of the leak, even if it’s internal.
Step 3: Check the Radiator Cap and System Pressure
A faulty radiator cap is a common culprit for mysterious coolant loss. If the cap cannot hold pressure, coolant will boil and escape through the overflow tube more easily. Test your radiator cap with a pressure test kit designed for caps, or simply replace it with a new, correct-pressure cap as a diagnostic step .
How to Fix Common Coolant Leaks
Once you’ve diagnosed the problem, you can proceed with the repair.
Repairing External Leaks
- Fixing a Leaking Radiator on the Trail: For a temporary trailside repair, you can use a high-quality radiator stop-leak product like Bar’s Leaks. This thick liquid is poured into the radiator and circulates to seal small leaks from the inside. For a physical fix on a flat fin-style tube, you can use needle-nose pliers to crimp and fold over the leaking tube . Important: These are emergency fixes to get you home; a proper repair should be done as soon as possible.
- Replacing Hoses: When replacing coolant hoses, always drain the coolant first. Use a sharp utility knife to cut stubborn hoses off the metal pipes, being careful not to score the pipe. Install new hoses and use new clamps for the best seal.
- Replacing the Water Pump: This is a more involved repair. It typically involves draining coolant and engine oil, removing the pump housing, and replacing the entire pump assembly (which usually comes with new seals and gaskets). It’s often recommended to replace the water pump preemptively every five years or so .
Repairing Internal Leaks
- Replacing a Blown Head Gasket: This is an advanced DIY repair that requires precision.
- Drain Coolant and Oil: Begin by completely draining the engine coolant and engine oil .
- Remove Obstructions: Take off any parts that prevent access to the cylinder head, such as the intake, exhaust, and valve cover.
- Remove the Cylinder Head: Unbolt and carefully lift off the cylinder head.
- Clean Surfaces Meticulously: Use a gasket scraper and a plastic scrubbing pad to remove all traces of the old head gasket from both the cylinder head and engine block surfaces. It is critical not to gouge or scratch these surfaces, or the new gasket will not seal .
- Inspect for Warpage: Use a straightedge and feeler gauges to check if the cylinder head is warped.
- Install New Gasket: Apply a small amount of gasket dressing if specified by the gasket manufacturer. Place the new head gasket in position (never reuse a head gasket).
- Reassemble and Torque: Reinstall the cylinder head. You must use a quality torque wrench and follow the manufacturer’s exact tightening sequence and torque specifications from your owner’s manual. Incorrect torquing will lead to another failure .
- Addressing a Cracked Cylinder Head or Block: Unfortunately, a cracked cylinder head often cannot be reliably repaired and will require replacement. A warped head can be resurfaced by a professional machine shop .
Prevention and Maintenance Strategies
The best way to deal with a coolant leak is to prevent it from ever happening.
- Use the Correct Coolant: Not all coolants are the same, even if they are the same color. Using the wrong type can lead to sludge, corrosion, and damage to your water pump. Green coolants are often silicate-free with organic acids, while pink coolants may use HOAT or OAT technology. Do not mix different types of coolant .
- Change Coolant Regularly: Over time, coolant becomes acidic and loses its anti-corrosive properties, attacking your engine from the inside. Follow your manufacturer’s recommended interval (typically every 2-5 years) to flush and replace the coolant .
- Perform Regular Inspections: Make it a habit to check your coolant level in the overflow tank (when the engine is cold) and look for any signs of leakage or residue around hoses and components before and after rides.
- Maintain Proper Concentration: Use a refractometer to check that your coolant mixture is correct, usually providing protection down to -37°C (-35°F). A mixture that is too concentrated reduces cooling efficiency, while a mixture that is too weak risks freezing inside the engine, which can push out frost plugs or even crack the engine block .
- Monitor System pH: Use pH test strips to check your coolant’s acidity. A pH that drops below 7 increases acidity and promotes internal corrosion, leading to leaks and blockages .
Conclusion
Knowing how to fix ATV coolant disappearing leak issues empowers you to protect your machine from severe damage and ensures many more years of reliable trail riding. The process always begins with careful diagnosis—determining whether you’re dealing with a simple external leak or a more complex internal failure. From a leaking hose or a faulty radiator cap to a blown head gasket, each problem has its solution, ranging from simple replacements to advanced mechanical repairs. By understanding your cooling system, performing regular maintenance with the correct fluids, and addressing minor issues before they become major failures, you can stop your coolant from mysteriously disappearing for good. Remember, your ATV’s cooling system is its first line of defense against engine destruction; giving it the attention it deserves is one of the smartest investments you can make as a rider.
Key Takeaways
- A “disappearing” coolant leak is often an internal leak, such as a blown head gasket letting coolant into the oil or combustion chambers, which is identified by milky oil or white exhaust smoke .
- Always start diagnosis with a visual inspection for external leaks, then check the oil and exhaust for signs of internal leakage before moving to more complex tests like a cooling system pressure test.
- Never mix different types of coolant, as this can create sludge and abrasives that damage the system. Always use the type specified by your ATV’s manufacturer .
- Regular maintenance, including periodic coolant changes and system inspections, is the most effective way to prevent leaks caused by corrosion, old age, and component failure .
- When replacing a head gasket, precision and a torque wrench are non-negotiable. The cylinder head bolts must be tightened in the correct sequence and to the exact specification to ensure a proper seal

