Table of Contents
Learning how to change ATV oil is one of the most fundamental skills every ATV owner needs to master for optimal vehicle performance and longevity. This essential maintenance task, while seemingly simple, plays a critical role in protecting your engine from excessive wear, maintaining power output, and preventing costly repairs down the trail. Much more than just draining old fluid and pouring in new, a properly executed oil change involves selecting the right lubricants, following methodical procedures, and understanding the specific needs of your machine based on its usage patterns and environment. This comprehensive guide will walk you through every aspect of the process—from gathering the correct tools and selecting the perfect oil type to step-by-step instructions and troubleshooting common issues. Whether you’re maintaining a workhorse utility vehicle or a high-performance sport quad, mastering these techniques will ensure your ATV continues to deliver reliable performance for years to come.
Why Regular ATV Oil Changes Are Critical
Engine oil serves as the lifeblood of your ATV, performing several vital functions that go far beyond simple lubrication. Understanding these roles makes it clear why fresh, clean oil is non-negotiable for engine health.
The primary purpose of motor oil is to create a protective barrier between moving metal components, preventing direct metal-to-metal contact that would quickly lead to excessive wear and engine failure. In an ATV engine, oil lubricates critical components like piston rings and cylinder walls, crankshaft bearings, and valve train components, all of which operate at incredibly high speeds and under significant pressure .
Beyond lubrication, oil serves several other essential functions. It helps dissipate heat from combustion and friction areas, carrying thermal energy away from critical components to the oil pan where it can dissipate. Oil also cleans the engine by suspending contaminants and carrying them to the oil filter, while also providing corrosion protection and helping to seal combustion chambers for optimal compression .
Neglecting oil changes allows the oil to become contaminated with dirt, metal particles, and combustion byproducts. This contamination causes the oil to lose its protective properties, potentially leading to increased engine wear, power loss, overheating, and ultimately catastrophic engine failure . Regular changes are especially crucial in ATVs subjected to hard work or aggressive riding, as added stress increases heat that can cause oils to lose viscosity and fail to maintain a protective film .
Selecting the Right Oil for Your ATV
Choosing the appropriate oil for your ATV is not a one-size-fits-all proposition. Using the wrong type or viscosity can negatively impact performance and potentially damage your engine over time.
Synthetic vs. Conventional Oil
The debate between synthetic and conventional oils often centers on performance versus cost. Conventional mineral oils are refined from crude oil and contain inherent impurities that limit their performance and longevity. Synthetic oils, on the other hand, are chemically engineered to provide superior protection and performance characteristics .
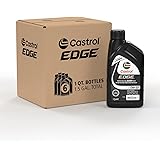
Synthetic oils offer several distinct advantages for ATV applications. They maintain viscosity better under extreme heat, resist sludge formation, and provide better protection against wear. While synthetics cost more upfront, their extended service intervals and superior protection often make them more cost-effective in the long run . For ATVs used in demanding conditions or extreme temperatures, synthetic oil is generally worth the additional investment.
Understanding Oil Viscosity and Specifications
Oil viscosity, indicated by numbers like 10W-40, refers to the oil’s resistance to flow at different temperatures. The first number (followed by “W” for winter) indicates cold-temperature flow, while the second number represents viscosity at operating temperature. Most modern ATVs perform well with 10W-40 oil, but always consult your owner’s manual for the manufacturer’s specific recommendation .
Using the wrong viscosity oil can lead to problems. Oil that’s too thick may not circulate properly during cold starts, while oil that’s too thin may not maintain adequate film strength at operating temperature. Both scenarios can result in accelerated engine wear.
Manufacturer Recommendations and Oil Types
The safest approach to oil selection is following your ATV manufacturer’s specific recommendations. Most owner’s manuals clearly state the recommended oil type, viscosity, and quality standards. Some manufacturers may even specify different oils depending on operating conditions or temperature ranges.
Table: ATV Oil Type Comparison
| Oil Type | Best For | Advantages | Considerations |
|---|---|---|---|
| Mineral Conventional | Older ATVs, light use, budget-conscious owners | Lower cost, adequate for standard conditions | Shorter change intervals, breaks down faster under stress |
| Full Synthetic | High-performance ATVs, extreme temperatures, heavy loads | Superior heat resistance, longer life, better wear protection | Higher initial cost, may not be needed for light use |
| Synthetic Blend | Moderate use, varying conditions | Better protection than conventional at moderate price point | Not as robust as full synthetic in extreme conditions |
Tools and Supplies Needed
Gathering the proper tools and materials before starting your oil change will make the process smoother and help avoid interruptions.
Essential Tools and Equipment
- Socket set and wrenches (typically metric for most ATVs)
- Oil drain pan (with sufficient capacity for your ATV’s oil volume)
- Funnel for clean oil addition
- New oil filter (ATV-specific)
- Oil filter wrench (if the filter is tightly installed)
- Gloves and rags/towels for cleanup
- Jack stands or ATV lift (if needed for access)
Safety Equipment
- Safety glasses to protect eyes from splashed oil
- Gloves to prevent skin contact with used oil
- Stable jack stands if lifting the ATV (never rely solely on a hydraulic jack)
Determining Oil Capacity
ATV oil capacities vary significantly by model and engine size. Most single-cylinder ATVs require between 1.5 and 2.5 quarts of oil, but always consult your owner’s manual for the exact specification . Using too much or too little oil can cause problems—overfilling may lead to foam formation and reduced lubrication, while underfilling can result in inadequate oil pressure and potential engine damage .
Preparation Steps Before Changing ATV Oil

Proper preparation ensures a safer, cleaner, and more effective oil change process.
Creating the Right Work Environment
Always perform oil changes on a flat, level surface to ensure complete drainage of old oil and accurate oil level readings when refilling. Good lighting will help you identify potential issues like leaks or damaged components. Adequate workspace around the ATV allows for comfortable access to drain plugs and filters .
Warming the Engine
Run your ATV’s engine for about 10 minutes before draining the oil. Warm oil flows more freely, carrying more contaminants with it and ensuring more complete drainage. Be careful not to overheat the engine—if the case or exhaust is too hot to touch comfortably, allow it to cool slightly before proceeding .
Locating Components and Initial Oil Check
Before starting, identify the location of key components:
- Drain plug (typically on the bottom of the engine case)
- Oil filter (location varies by model)
- Dipstick or oil fill cap
- Any panels or skid plates that need removal for access
Check the current oil level using the dipstick to establish a baseline. This can provide clues about your engine’s oil consumption patterns .
Step-by-Step Guide: How to Change ATV Oil
Follow these methodical steps to complete a thorough ATV oil change.
Draining the Old Oil
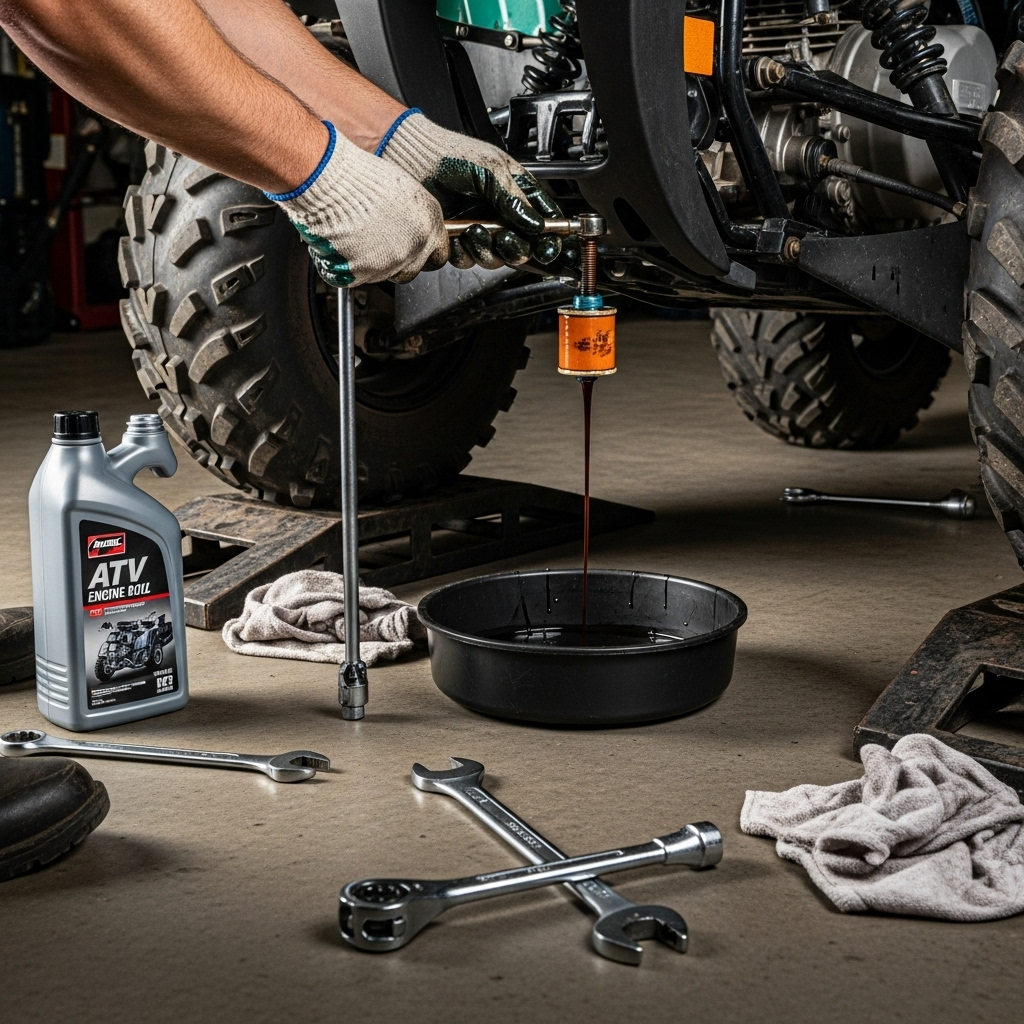
- Position the drain pan beneath the ATV’s drain plug, ensuring it has sufficient capacity to contain all the oil.
- Remove the drain plug using the appropriate socket or wrench, turning counterclockwise. Some ATVs have multiple drain plugs—consult your manual if unsure.
- Allow complete drainage. Let the oil drain until it slows to an occasional drip. This may take 10-15 minutes for thorough drainage.
- Inspect the drain plug for metal particles or excessive debris, which could indicate internal engine wear. Clean the plug and its magnetic tip (if equipped) before reinstalling.
- Reinstall the drain plug with a new washer if needed, tightening to the manufacturer’s specified torque (if available) or until snug. Avoid overtightening, which can strip threads .
Replacing the Oil Filter
- Position the drain pan beneath the oil filter to catch residual oil that will escape during filter removal.
- Remove the old filter using an oil filter wrench if it’s tight. Some ATVs have cartridge filters with covers rather than spin-on filters .
- Prepare the new filter by lightly lubricating the gasket with fresh oil. This ensures a proper seal and prevents damage during installation.
- Install the new filter. For spin-on filters, hand-tighten until the gasket contacts the mounting surface, then tighten an additional 3/4 turn as recommended by most filter manufacturers. For cartridge filters, ensure the O-ring is properly seated and the cover is securely fastened .
Adding New Oil
- Locate the oil fill opening, typically marked with a dipstick or fill cap.
- Insert a funnel to prevent spills.
- Pour fresh oil slowly, starting with about 75% of the recommended capacity.
- Wait a minute for the oil to settle into the oil pan.
- Check the level with the dipstick, adding more oil gradually until it reaches the full mark. Be careful not to overfill .
Post-Change Procedures and Verification
Completing these final steps ensures your oil change was successful and your ATV is ready for operation.
Initial Circulation and Leak Check
- Start the engine and let it run for about 10 seconds, then shut it off. This circulates oil throughout the engine and fills the new filter .
- Check for leaks around the drain plug and oil filter while the engine is running and immediately after shutting it off.
- Inspect the oil pressure light (if equipped) to ensure it goes out shortly after startup.
Final Oil Level Verification
- Wait 1-2 minutes after shutting off the engine to allow oil to drain back to the sump.
- Check the dipstick again, adding more oil if necessary to bring it to the proper level. The correct level is typically between the “low” and “high” marks, or within the cross-hatched area on the dipstick .
Cleanup and Proper Disposal
- Wipe up any spills using rags or absorbent materials.
- Transfer used oil to a sealed container for recycling.
- Take used oil and filters to an approved recycling center—most auto parts stores accept these materials at no charge. Never dispose of used oil in trash drains or on the ground.
Troubleshooting Common Oil Change Issues
Even with careful work, you may encounter situations that require additional attention.
Identifying and Addressing Oil Burning
If your ATV appears to be consuming oil between changes (evidenced by blueish smoke from the exhaust or decreasing oil levels), several issues could be responsible. Worn valve stem seals often cause oil consumption, particularly noticeable at startup as a cloud of blueish-white smoke. Piston ring wear can allow oil to enter the combustion chamber, while overfilling can force excess oil past seals and into areas where it shouldn’t be .
Dealing with Leaks After Oil Change
Leaks following an oil change typically originate from a few common sources. An overtightened or cross-threaded drain plug can damage threads, while an improperly installed oil filter (damaged gasket, not lubricated, or under/over-tightened) is another frequent culprit. Double-check these components if you discover leaks post-change.
When Oil Changes Reveal Underlying Problems
During an oil change, you might discover signs of more serious issues. Metallic particles in the drained oil could indicate internal engine wear. Milky, foamy oil suggests coolant contamination, possibly from a leaking head gasket. In these cases, further diagnosis by a qualified technician may be necessary.
ATV Oil Change Maintenance Schedule
Establishing and adhering to a regular oil change schedule is crucial for long-term engine health.
Manufacturer Recommendations vs. Real-World Use
While your owner’s manual provides baseline service intervals, these are often based on ideal conditions. Most manufacturers recommend changes every 100 hours of operation or annually, whichever comes first, with some suggesting more frequent changes for severe service . However, your specific usage patterns may necessitate more frequent changes.
Factors Requiring More Frequent Changes
- Dusty or muddy conditions that challenge the air filtration system
- Frequent short trips where the engine doesn’t reach full operating temperature
- Extreme temperatures (very hot or cold)
- Heavy loading or towing applications
- Aggressive riding or high-RPM operation
Establishing Your Personal Maintenance Schedule
Track your ATV’s usage hours or mileage to determine your optimal change interval. Many riders find that changing oil more frequently than the minimum recommendation provides inexpensive insurance against major repairs.
Table: ATV Oil Change Interval Guidelines
| Usage Type | Recommended Interval | Additional Considerations |
|---|---|---|
| Recreational Riding | 100 hours or 1 year | Normal conditions, moderate speeds |
| Heavy Work Use | 50 hours or 6 months | Towing, hauling, prolonged operation |
| Racing/Competition | Every 1-3 events | Extreme RPMs, maximum engine stress |
| Infrequent Use | Annually regardless of hours | Condensation removal, acid neutralization |
| Severe Conditions | 25-50 hours | Dusty, wet, or extreme environments |
Advanced Tips and Best Practices
Beyond the basic oil change procedure, these practices will help you optimize your ATV’s performance and longevity.
The Importance of Oil Filter Quality
Not all oil filters are created equal. High-quality filters feature better filtration media, anti-drainback valves to prevent dry starts, and stronger construction. Investing in a premium filter provides better engine protection for a relatively small additional cost.
Maintaining Records and Establishing a Routine
Keep a simple log of each oil change, including date, hours/mileage, oil type and quantity, and any observations. This record helps you establish patterns, track consumption trends, and maintain consistent service intervals. Digital reminders or notes in your owner’s manual can help you stay on schedule.
Complementary Maintenance Tasks
While performing oil changes, it’s convenient to complete other routine maintenance. Consider checking and cleaning the air filter, inspecting coolant levels, checking tire pressure, and lubricating control linkages during the same service session . This comprehensive approach ensures all critical systems receive regular attention.
Conclusion
Mastering how to change ATV oil is an essential skill that pays dividends in engine longevity, performance reliability, and overall ownership satisfaction. While the process requires attention to detail and proper preparation, it remains well within the capabilities of most ATV owners with basic tools and mechanical aptitude. By selecting the appropriate oil for your machine and usage patterns, following methodical procedures, and adhering to a consistent maintenance schedule, you protect your investment against premature wear and potentially catastrophic failures. Remember that this fundamental maintenance task provides an opportunity to inspect your ATV for developing issues and ensure it remains ready for your next adventure. With the knowledge contained in this guide, you’re equipped to approach ATV oil changes with confidence, knowing you’re taking one of the most important steps toward maximizing your vehicle’s service life and performance potential.
Key Takeaways
- Regular oil changes are the single most important maintenance task for preventing ATV engine wear and ensuring long-term reliability.
- Always consult your owner’s manual for specific oil type, viscosity, and capacity recommendations before beginning an oil change.
- Synthetic oils typically provide superior protection under the extreme conditions and temperature variations that ATVs commonly encounter.
- Proper disposal of used oil and filters is both an environmental responsibility and often a legal requirement.
- Maintaining records of oil changes and related observations helps establish patterns and optimize your maintenance schedule.
Sources
- ATV Trader: 9 Steps for Changing the Oil in Your Off-Road Vehicle
- Instructables: Changing Oil on a ATV
- FODSports: How To Stop ATV From Burning Oil? Ultimate Solution 2025
- AMSOIL Blog: ATV/UTV Maintenance Tips to Maximize Machine Life

