Table of Contents
There are few automotive frustrations more immediate than a power window that won’t operate, especially when you’re facing a drive-through, a toll booth, or a sudden downpour. A faulty power window switch can leave you trapped with a window stuck open or closed, but you don’t necessarily need a mechanic to regain immediate control. So, how do you bypass a power window switch to get your window moving again?
This comprehensive guide will walk you through several proven methods to temporarily bypass a faulty power window switch. We’ll cover everything from the straightforward direct-power method using jumper wires to more advanced diagnostic techniques for modern, module-controlled systems. You’ll learn not just the “how,” but also the “why,” ensuring you can approach the problem safely and effectively, regardless of your vehicle’s make or model.
Understanding Your Power Window System
Before you start pulling panels and touching wires, it’s crucial to understand the basic components you’re dealing with. A typical power window system consists of three main parts:
- The Switch: This is the control you press. It directs power to the motor.
- The Motor: This electric motor does the physical work of moving the window up and down.
- The Regulator: This is the mechanical assembly that converts the motor’s rotation into the up-and-down motion of the window.
When you press the switch, it completes a circuit, sending power to the window motor. The switch is cleverly designed to reverse the polarity of the electricity sent to the motor; power applied to one terminal makes the motor spin one way to lower the window, while power applied to the other terminal makes it spin the opposite way to raise the window .
The goal of bypassing the switch is to recreate this function manually, sending power directly to the motor to prove whether the switch is the problem or not.
Preliminary Checks: Is It Really the Switch?
Bypassing the switch is a diagnostic step as much as it is a temporary fix. Before you begin, it’s wise to perform a few simple checks to ensure the problem isn’t something simpler.
- Check the Fuse: Locate your vehicle’s fuse box (consult your owner’s manual) and check the fuse labeled for power windows. A blown fuse is a common and easy fix.
- Listen for Noise: When you press the switch, do you hear a “click” from the switch or a faint “hum” from the door? A click might indicate the switch is working but the motor isn’t. A hum could mean the motor is getting power but the regulator is stuck. Silence often points to a lack of power, implicating the fuse, switch, or wiring.
- Test Other Switches: If your vehicle has a master switch on the driver’s door and individual switches on other doors, test them all. If only one switch fails to operate its window, that switch is likely the culprit. If none of the switches work for one particular window, the issue could be with the motor or its wiring. If no switches work on any window, suspect a blown fuse or a problem with the main power supply.
Safety First: Essential Precautions
Working with electrical components requires caution. Please adhere to the following safety guidelines to protect yourself and your vehicle’s electrical system:
- Disconnect the Battery: Before you start, disconnect the negative terminal of your car battery. This prevents short circuits, accidental shocks, and damage to vehicle electronics while you are working on the wiring.
- Use Proper Tools: Have the right tools on hand. You will likely need a flathead screwdriver or a trim removal tool, a multimeter, wire strippers, and electrical tape.
- Work in a Safe Environment: Ensure the vehicle is parked on a level surface, the parking brake is engaged, and you are working in a well-lit area.
- Understand the Temporary Nature: The methods described here are temporary fixes. A bypass is not a replacement for a properly functioning switch. Plan to replace the faulty switch as soon as possible to ensure long-term safety and convenience.
Method 1: The Direct Bypass with Jumper Wires
This is the most common and universal method for bypassing a power window switch. It works by applying power directly from the vehicle’s battery to the window motor, effectively cutting the switch out of the equation.
Tools and Materials You Will Need:
- 12-volt battery (your car’s battery is fine)
- Two jumper wires with alligator clips at both ends
- Basic screwdriver set
- Wire strippers
- Electrical tape
Step-by-Step Guide:
Step 1: Access the Window Switch and Wiring
First, you need to get to the back of the power window switch. Carefully use a trim removal tool or a flathead screwdriver (wrapped in tape to prevent scratches) to pry off the switch panel from the door card or center console. Once the panel is removed, you should see the switch and its electrical connector. Gently unplug the wiring harness from the back of the switch .
Step 2: Identify the Power and Motor Wires
This is the most critical step. The switch connector will have multiple wires. You need to identify the two main wires that lead directly to the window motor. Consult a vehicle-specific wiring diagram for the most accurate information. Generally, you are looking for two thicker wires that are the same color, or one with a stripe. These are often the ones that carry the high current to the motor. Use your multimeter to help verify if you are unsure.
Step 3: Connect the Jumper Wires to the Battery
With the car battery connected, take your two jumper wires. Attach one alligator clip to the positive terminal (+) of the battery and the other end to one of the two motor wires you identified. Then, attach one clip of the second jumper wire to the negative terminal (-) of the battery and touch the other end to the second motor wire .
Step 4: Operate the Window and Reverse Polarity
The window should immediately start moving either up or down. If it moves in the direction you want, great! If it moves in the opposite direction, simply reverse the connections. Swap the jumper wires on the two motor terminals. The window should now move in the desired direction .
Step 5: Disconnect and Secure
Once you have the window in the desired position, disconnect the jumper wires from the battery first, then from the motor wires. You can temporarily secure the exposed connector with electrical tape to prevent short circuits until you can replace the switch.
Method 2: Manual Override for Emergency Raising
If your window is stuck down and you cannot get it to move with power, or if you are not comfortable working with electrical components, you may be able to raise it manually. This usually requires more disassembly but is a mechanical solution to an electrical problem.
Step 1: Remove the Door Panel
This process varies by vehicle but typically involves removing screws (often hidden behind covers or in armrests) and then carefully unclipping the panel from the door frame.
Step 2: Locate the Window Regulator
Once the panel is off, you will see the window motor and regulator mechanism. This is a series of arms, gears, and tracks that guide the window.
Step 3: Manually Crank the Motor
In some cases, you can carefully use a wrench on the motor shaft to turn it and raise the window. Turn it slowly clockwise or counterclockwise until the window closes. If you encounter significant resistance, stop immediately to avoid damaging the mechanism .
Step 4: Secure the Window
Since the regulator is not designed to hold the window up without the motor engaged, you may need to use strong tape or a piece of wood to wedge the window in the closed position until repairs can be made.
Advanced Diagnostics and Modern Systems
The direct bypass method works perfectly for older, simpler systems where the switch directly controls the high-current flow to the motor. However, many modern vehicles use a different, more complex system.
The Challenge of Module-Controlled Windows
In newer vehicles, the window switch doesn’t send power directly to the motor. Instead, it sends a low-voltage signal to a door control module or body control module (BCM). This computer then sends the command to the motor. In these systems, the switch is more like a keyboard key telling the computer what to do, rather than a light switch turning on a bulb.
As one expert on an automotive forum explained, a driver’s side master switch might not simply close a circuit to ground. Instead, it may use “resistors of different values which drops the signal down to varying voltages. This allows the control unit to receive more signals using far fewer wires” .
How to Test a Module-Controlled Switch
If you have a modern vehicle and the direct bypass method fails, here is a different approach:
- Access the Switch: Remove the switch as described in Method 1.
- Use a Wiring Diagram: This is non-negotiable. You need a vehicle-specific diagram to identify the signal wires.
- Test with a Multimeter: Set your multimeter to DC volts. With the switch connected and the ignition on, probe the signal wires. When you press the “down” button, you might see the voltage drop to a specific value (e.g., 4.5 volts). When you press “up,” it might drop to a different voltage .
- Interpret the Results: If you see these voltage changes, it indicates the switch is likely working correctly and sending the proper signals to the module. The problem may lie with the module itself or the motor. If you see no voltage change, the switch is probably faulty.
In these complex systems, using a scan tool that can communicate with the door module is often the most effective way to diagnose the problem, as it can tell you if the module is receiving the switch commands.
When to Seek Professional Help
While bypassing a switch is a valuable skill, there are times when calling a professional is the best course of action.
- Complex Modern Systems: If you’ve determined your vehicle has a module-controlled system and you’re not comfortable with advanced electrical diagnostics.
- No Success with Bypass: If you apply direct power to the motor wires and nothing happens, the motor itself may be faulty, which often requires replacement.
- Lack of Proper Tools or Confidence: If you don’t have a multimeter or feel unsure about any step, the cost of a professional repair may be worth the peace of mind.
Final Verdict: How to Bypass Power Window Switch
Knowing how to bypass a power window switch is an empowering piece of automotive knowledge that can get you out of a jam. The process can be as simple as using jumper wires to send power directly to the motor, effectively proving whether the switch is the problem. Remember the core principle: the switch reverses polarity to the motor; you can do the same thing manually with jumper wires .
However, always approach this as a temporary, diagnostic fix. Modern vehicles with complex computer-controlled systems may require a different diagnostic approach, as the simple jumper wire method may not work . Your safety and the integrity of your vehicle’s electrical system are paramount. Use this guide to regain control of your window, but make a permanent repair—either by replacing the switch yourself or visiting a trusted technician—your top priority.


HPBS 5000A Jump Starter with Air Compressor, Portable Car Battery Jump Starter with 150 PSI Tire Inflator for Up to 10.0L Gas and 8.0L Diesel Engines, 12V Jump Box Battery Charger Booster(Red)
$69.99 (as of March 24, 2026 11:12 GMT +00:00 - More infoProduct prices and availability are accurate as of the date/time indicated and are subject to change. Any price and availability information displayed on [relevant Amazon Site(s), as applicable] at the time of purchase will apply to the purchase of this product.)


Amazon Basics Microfiber Cleaning Cloths, Ultra Absorbent, Lint Free, Streak Free, Non-Abrasive, Reusable and Washable, 16" x 12", Blue/White/Yellow, Pack of 24
$9.98 (as of March 24, 2026 10:45 GMT +00:00 - More infoProduct prices and availability are accurate as of the date/time indicated and are subject to change. Any price and availability information displayed on [relevant Amazon Site(s), as applicable] at the time of purchase will apply to the purchase of this product.)


Powools Tire Inflator Portable Air Compressor - 3X Faster Inflation Air Pump with LED Light, Auto Shut-Off Tire Pump with 4 Nozzles for Car, Motorcycle, Bicycle, Ball, Black
$17.99 (as of March 24, 2026 11:12 GMT +00:00 - More infoProduct prices and availability are accurate as of the date/time indicated and are subject to change. Any price and availability information displayed on [relevant Amazon Site(s), as applicable] at the time of purchase will apply to the purchase of this product.)


NOCO GENIUS5: 5A 6V/12V Smart Battery Charger – Automatic Maintainer, Trickle Charger & Desulfator with Overcharge Protection & Temperature Compensation – for Lead-Acid & Lithium Batteries
$69.87 (as of March 24, 2026 09:33 GMT +00:00 - More infoProduct prices and availability are accurate as of the date/time indicated and are subject to change. Any price and availability information displayed on [relevant Amazon Site(s), as applicable] at the time of purchase will apply to the purchase of this product.)


CKAuto Tire Valve Stem Caps, Black, 4 pcs/Pack, Anodized Aluminum Tire Valve Cap Set, Corrosion Resistant, Universal Stem Covers for Cars Trucks Motorcycles SUVs and Bikes
$5.99 (as of March 24, 2026 09:32 GMT +00:00 - More infoProduct prices and availability are accurate as of the date/time indicated and are subject to change. Any price and availability information displayed on [relevant Amazon Site(s), as applicable] at the time of purchase will apply to the purchase of this product.)


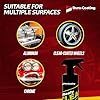


DURA-COATING TECHNOLOGY Wheely Clean - Professional Wheel Cleaner Spray - Ready-to-Use Tire Cleaner and Rim Cleaner - Suitable for Aluminum, Chrome, or Clear-Coated Wheels - Removes Brake Dust - 16 oz
$26.99 (as of March 24, 2026 09:33 GMT +00:00 - More infoProduct prices and availability are accurate as of the date/time indicated and are subject to change. Any price and availability information displayed on [relevant Amazon Site(s), as applicable] at the time of purchase will apply to the purchase of this product.)


MAX Advanced Brakes - Brake Kit For 2011-2016 Hyundai Elantra, 2014-2018 Kia Forte| Carbon Ceramic Brake and Rotor Kit Front and Rear| OE Replacement Brake Rotors
$162.99 (as of March 24, 2026 04:54 GMT +00:00 - More infoProduct prices and availability are accurate as of the date/time indicated and are subject to change. Any price and availability information displayed on [relevant Amazon Site(s), as applicable] at the time of purchase will apply to the purchase of this product.)
Meguiar's Gold Class Car Wash, Ultra-Rich Foam Car Wash Soap and Conditioner for Vehicle Cleaning, Paint Cleaner to Clean and Condition in One Easy Step, 1 Gallon
$21.69 (as of March 24, 2026 09:33 GMT +00:00 - More infoProduct prices and availability are accurate as of the date/time indicated and are subject to change. Any price and availability information displayed on [relevant Amazon Site(s), as applicable] at the time of purchase will apply to the purchase of this product.)


Kaistyle for Magsafe Car Mount【20 Strong Magnets】Magnetic Phone Holder for Car Phone Holder Mount Dash Mounted Holders Cell Phone Holders for Your Car Accessories for Women Men for iPhone 17 16 15 14
$9.99 (as of March 24, 2026 10:45 GMT +00:00 - More infoProduct prices and availability are accurate as of the date/time indicated and are subject to change. Any price and availability information displayed on [relevant Amazon Site(s), as applicable] at the time of purchase will apply to the purchase of this product.)