Table of Contents
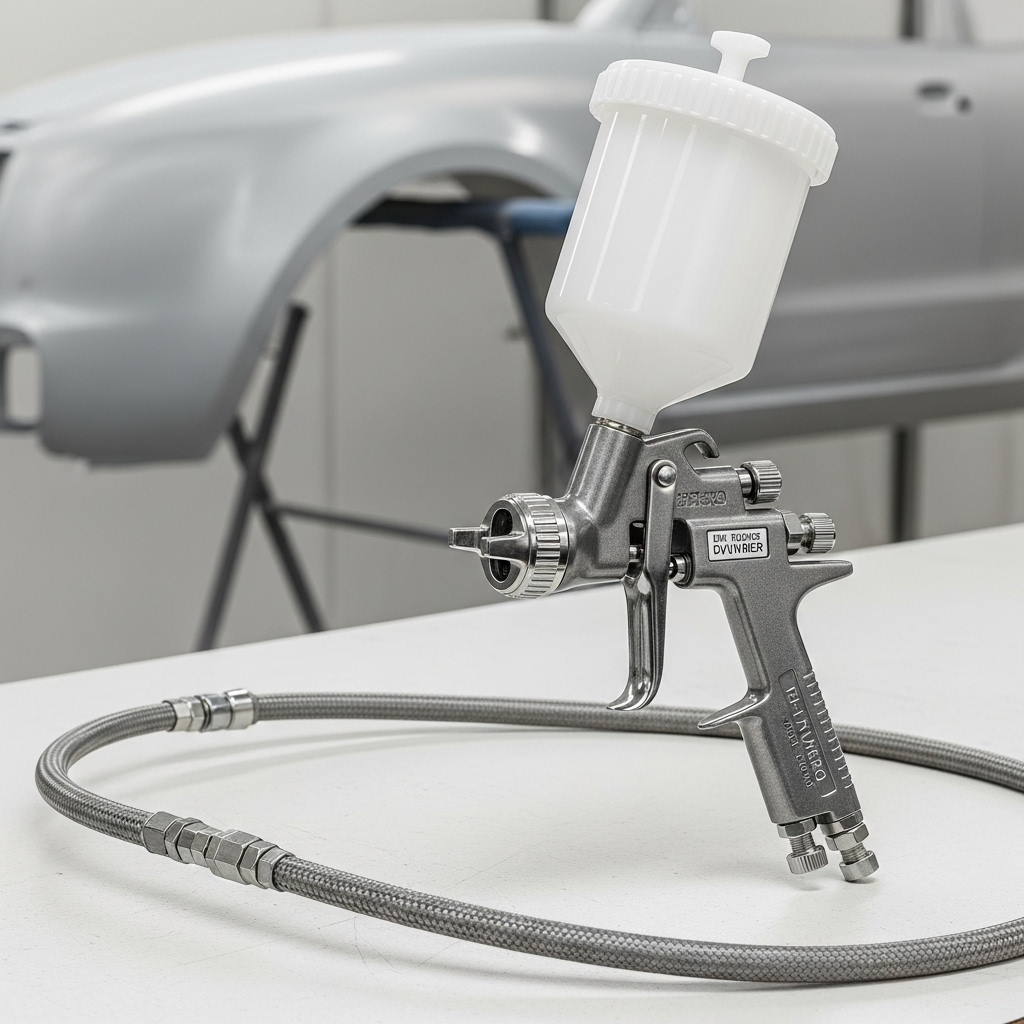
Selecting the best automotive paint gun for primer is one of the most critical decisions you’ll make in any vehicle restoration or repair project. The right primer gun doesn’t just lay down a coat of material—it sets the foundation for your entire paint job, filling minor imperfections, creating a uniform surface, and ensuring the topcoats of color and clear have a perfect canvas to adhere to. Using the wrong spray gun for primer can lead to a host of issues, from orange peel texture and sand-throughs to poor adhesion and a finish that fails to stand the test of time. This comprehensive guide will demystify the process of choosing and using the perfect primer gun. We’ll explore the different types of spray guns, break down the key features that matter for primer application, and provide specific recommendations for everything from DIY projects to professional high-volume shops. Understanding the tools and techniques for applying primer correctly will elevate the quality of your work and save you time, money, and frustration in the long run.
Understanding Primer and Why It Needs a Specialized Gun
Primer is fundamentally different from basecoats and clearcoats, and these differences dictate the need for a specific type of spray gun. Unlike thin, highly pigmented color coats or clearcoats designed for maximum gloss, primer has a distinct job: to adhere to bare substrate, fill sand scratches and minor imperfections, and create a uniform, sealed surface. Most primers, especially high-build polyesters and epoxies, are thicker and have a higher viscosity than other automotive paints. Trying to spray these materials through a gun designed for fine basecoats will result in poor atomization, an uneven pattern, and constant clogging.
A gun designed for primer is engineered to handle these challenges. Its key advantages include:
- Efficient Material Delivery: Primer guns are built to move a higher volume of thicker material without straining the gun or the compressor .
- Superior Atomization of Thicker Products: They feature fluid nozzles and air caps designed to break up viscous primers into a fine, consistent mist, which is essential for a smooth, easy-to-sand film .
- Durability: Primers can be abrasive. Guns built for primer duty often have hardened fluid passages and stainless-steel components to resist wear .
Attempting to use a single gun for all steps—primer, base, and clear—often leads to compromised results at every stage. Dedicated equipment is the hallmark of a professional-quality finish.
Types of Paint Guns: HVLP, LVLP, and Conventional
The first step in choosing the best automotive paint gun for primer is understanding the different technologies available. The technology governs how the gun atomizes the material and how efficiently it transfers it to the surface.
HVLP (High Volume, Low Pressure)
HVLP guns use a high volume of air delivered at low pressure (typically below 10 psi at the air cap) to atomize the coating. This technology is renowned for its high transfer efficiency, meaning a greater percentage of the material ends up on the surface rather than as wasteful overspray. This is a significant advantage when spraying expensive materials. For primers, HVLP guns provide excellent control and a quality finish while meeting the stringent environmental regulations that limit VOC emissions in many regions . The main consideration is that they require a sufficient volume of air from a compressor, typically in the range of 12-15 CFM for a full-size primer gun .
LVLP (Low Volume, Low Pressure)
LVLP guns take the low-pressure concept a step further. They use even less air volume and pressure than HVLP guns to achieve atomization. This makes them an excellent choice for painters with smaller air compressors that might not be able to keep up with the demands of an HVLP gun. While they are extremely efficient on air consumption, the trade-off can sometimes be in the maximum fluid delivery rate, which may be a factor when trying to cover very large surfaces quickly with primer.
Conventional / High-Pressure Spray Guns
These were the industry standard for decades. They use high air pressure to atomize the material, which can create a fine finish but also generates a significant amount of overspray and bounce-back. This results in lower transfer efficiency—you use more primer to achieve the same coverage, and the airborne mist can create a dusty, contaminated work environment. Due to environmental regulations and material costs, conventional guns have largely been phased out in favor of HVLP in professional automotive settings.
Table: Automotive Spray Gun Technology Comparison
| Gun Type | How It Works | Best For | Pros | Cons |
|---|---|---|---|---|
| HVLP | High air volume at low pressure (<10 psi) | Primer, basecoat, clearcoat; professionals and serious DIYers | High transfer efficiency, less overspray, compliant with regulations | Requires a large air compressor (12+ CFM) |
| LVLP | Low air volume and low pressure | DIYers with smaller compressors; detail work | Very efficient on air consumption, low overspray | May have slower fluid delivery for large areas |
| Conventional | High air pressure for atomization | Industrial applications (largely obsolete for auto refinishing) | Powerful atomization, fast coverage | High overspray, wasteful, not VOC compliant |
Key Features to Look for in a Primer Spray Gun
When you’re evaluating specific models, several technical features will determine whether a gun is well-suited for primer. Pay close attention to these specifications.
Fluid Nozzle Size: The Most Critical Choice
The fluid nozzle (or orifice) and needle combination is the heart of the spray gun, and its size determines the volume and type of material it can handle. Primer requires a larger opening than basecoat or clearcoat.
- For Most Primers (1.8mm – 2.0mm): A nozzle size between 1.8mm and 2.0mm is considered the industry standard for high-build primers, surfacers, and most epoxy primers . This size provides an ideal balance of material flow and atomization.
- For Heavy-Body Primers (2.0mm – 2.5mm): For very thick polyester-based fill primers or when applying primer over very large areas quickly, a larger 2.2mm or even 2.5mm nozzle may be beneficial. However, atomization can become more challenging at these larger sizes.
- For Sealers and Thinner Primers (1.4mm – 1.6mm): If you are primarily spraying a thinner primer-sealer or epoxy primer, a smaller nozzle in the 1.4mm to 1.6mm range can provide excellent atomization.
Many dedicated primer guns, like the DeVilbiss FinishLine FLG, often come as a kit with multiple nozzle sizes (e.g., 1.8mm and 2.0mm) to provide versatility for different products .
Fluid and Air Control: Precision in Your Hands
A quality primer gun gives you complete and easy control over the spray pattern.
- Fluid Control Knob: This allows you to adjust the volume of material released when you pull the trigger. This is crucial for controlling the flow of thicker primers.
- Air Control Knob (Fan Pattern Control): This valve adjusts the width of the spray fan, allowing you to switch from a wide pattern for large panels to a small, round pattern for spot repairs.
- Pattern Adjustment: A high-quality air cap is essential for creating a clean, uniform fan pattern without tails or streaks, ensuring an even application of primer.
Material Feed: Gravity vs. Pressure
For primer application, the feed type is an important practicality consideration.
- Gravity Feed (Cup on Top): These guns have a cup mounted on top. They are very efficient, as gravity assists in material delivery, and they can often spray thicker materials more easily. They also work well at lower air pressures. The main drawback is that the cup capacity is often limited to one liter, which may require frequent refills on large projects .
- Pressure Feed (Cup on Bottom or Remote Tank): Siphon-feed guns are generally not suitable for thick primers. However, a pressure feed system, where a pressurized cup or a remote tank is used, is excellent for high-volume priming. The pressure pushes the material to the gun, allowing for a continuous feed from a large container (e.g., a 5-gallon pail) and making it easier to spray in any orientation.
Build Quality and Durability
Primer guns take a beating. They are used with abrasive materials and require frequent, aggressive cleaning. Look for guns with:
- Stainless Steel Fluid Passages: Critical components like the fluid needle, nozzle, and air cap should be made of corrosion-resistant stainless steel to withstand abrasion and solvent cleaning .
- Robust Seals: High-quality seals will resist the chemicals found in primers and strong cleaning solvents like lacquer thinner.
- Solid Construction: A well-built gun will feel balanced in your hand and withstand the rigors of daily use in a shop environment.
Top Contenders for the Best Automotive Paint Gun for Primer

The “best” gun depends heavily on your budget, frequency of use, and specific needs. The following brands and models consistently rise to the top for primer application.
Professional-Grade Workhorses
For the professional painter or the serious enthusiast who demands the utmost in performance and durability, these brands are the gold standard.
- DeVilbiss: A pioneer in the industry, DeVilbiss offers a range of guns suitable for priming. Their PROLite series is a professional favorite for its lightweight design and excellent atomization. More specifically, the DeVilbiss FinishLine FLG is a model explicitly engineered for primers, featuring stainless steel parts and coming with 1.8mm and 2.0mm nozzles to handle a wide range of products .
- SATA: Often considered the top-tier brand, SATA spray guns are known for their flawless finish and exceptional ergonomics. A model like the SATAjet 5000 with a 2.0mm RPS fluid tip is a superb choice for primer, offering excellent pattern control and atomization. While expensive, they are an investment in quality and reliability .
- Anest Iwata: Another industry leader, Iwata guns are engineered with precision and renowned for their fine atomization. Their W400 series guns are versatile and can be configured for primer, base, or clear, making them a flexible choice for a shop that wants top performance across all stages.
Exceptional Value for Money
For those who need professional results without the professional price tag, these options offer a compelling balance.
- Eastwood: Eastwood’s Evolution HVLP spray gun has developed a strong following among restorers and DIYers. It features a lightweight composite body and is known for handling thicker paints and primers well, often coming with a recommended 2.0mm tip for such materials .
- VEVOR: VEVOR’s HVLP spray gun kits have garnered positive reviews from both DIYers and some professionals for their surprising performance at a budget-friendly price. These kits often include multiple guns or nozzles (e.g., 1.4mm and 1.8mm), providing a versatile solution for primers, basecoats, and clearcoats. Users report that they “atomizes the paint very well” and can handle everything from “automotive and aviation and cerakote paints” .
Budget-Conscious and DIY Favorites
For hobbyists on a tight budget or those who paint infrequently, a low-cost gun can be a viable option.
- Harbor Freight (Central Pneumatic): The purple HVLP spray gun from Harbor Freight is frequently described as the “Saturday night special” of paint guns—incredibly cheap and potentially effective, but not built to last . Many users have achieved respectable results with these guns, especially after some practice with settings and material thinning. As one user on the Hobby Machinist forum noted, “I’ve had good results with SW paint using my $12 HF spray gun” . The consensus is that these are “disposable” guns; when they fail or become too gummed up, you simply replace them.
The Perfect Match: Pairing Your Gun with Air Supply and Primers
A spray gun is only as good as the system that supports it. Neglecting your air supply or mismatching your gun settings to your primer is a recipe for failure.
Air Compressor Requirements
HVLP guns are air-hungry tools. Before purchasing any gun, check its CFM (Cubic Feet per Minute) requirements at a specific PSI. A typical full-size HVLP gun for primer will require at least 12 CFM at 30-50 PSI . If your compressor cannot deliver this sustained airflow, the gun pressure will drop, leading to poor atomization, a blotchy pattern, and a ruined finish. Always ensure your compressor is rated for your gun’s CFM needs.
Air Preparation is Non-Negotiable
Clean, dry air is absolutely critical for a flawless primer application. Any moisture, oil, or dirt in your air line will be blasted into your fresh primer, creating craters, fish eyes, and contamination. Your air supply system must include:
- A Primary Filter/Regulator: Located near the compressor tank, this removes bulk water and particulate.
- An Air Dryer or Coalescing Filter: Placed closer to the spray gun, this is essential for removing water vapor and oil aerosols. As one experienced painter advises, “A coalescing filter & desiccant drier is a good idea for paint air” .
Primer and Gun Configuration Guide
Different primers have different viscosities and require slight adjustments to your gun setup and technique.
Table: Primer Type and Spray Gun Configuration
| Primer Type | Recommended Nozzle Size | Key Gun Settings & Tips |
|---|---|---|
| High-Build Polyester/Urethane Surfacer | 1.8mm – 2.2mm | Use a wider fan pattern and consistent, overlapping passes to achieve build. May require higher fluid flow. |
| Epoxy Primer/Sealer | 1.4mm – 1.8mm | Thinner material; can use a smaller nozzle for excellent atomization. Apply in 1-2 medium-wet coats. |
| Primer-Sealer | 1.3mm – 1.6mm | Similar to basecoat; requires fine atomization for a smooth, sealed surface. |
| Self-Etching Primer | 1.4mm – 1.6mm | Typically thin; apply in light, misty coats. A smaller nozzle provides better control. |
Mastering Technique: How to Spray Primer Like a Pro
The finest spray gun in the world cannot compensate for poor technique. Applying primer correctly is a skill that combines the right tools with practiced movements.
Preparation: The 80% Rule
A common saying in the industry is that “painting is 80% preparation and 20% application.” This is especially true for primer.
- Surface Prep: The substrate must be perfectly clean, dry, and sanded. Remove all dust with a tack cloth.
- Primer Prep: Always strain your primer through a paint strainer before pouring it into the gun cup to remove any lumps or debris that could clog the nozzle.
- Gun Setup: Set the air pressure to the manufacturer’s recommendation for your primer. Start with the fluid knob 2-3 turns open and the fan pattern knob in the middle.
Spraying Motion and Pattern
- Distance: Keep the gun nozzle 6 to 8 inches from the surface. Closer leads to runs and sags; farther away creates a dry, rough “orange peel” texture.
- Angle: Keep the gun perpendicular to the surface at all times. Tilting the gun will create an uneven film build.
- Speed: Move the gun at a consistent, steady speed. A good pace is roughly one foot per second.
- Overlap: Each pass should overlap the previous one by 50%. This ensures complete, uniform coverage without stripes or thin spots.
- Triggering: Always start your motion before pulling the trigger, and release the trigger after passing the edge of the panel. This prevents heavy build-up at the beginning and end of each stroke.
Avoiding Common Primer Problems
- Orange Peel: Caused by material drying before it flows out. Can be due to incorrect thinner, low air pressure, or holding the gun too far away .
- Runs and Sags: Too much material applied too quickly. Caused by moving too slowly, holding the gun too close, or having the fluid flow set too high.
- Dry Spray: A sandy, rough texture caused by the gun being too far from the surface or the primer not being properly reduced.
Maintaining Your Primer Gun for a Long Service Life
Primer dries quickly and is difficult to remove once cured. Proper and immediate cleaning is the most important thing you can do to protect your investment.
Cleaning Procedure After Every Use
- Empty the Cup: Pour any unused primer back into its container.
- Flush with Solvent: Pour an appropriate cleaner (e.g., lacquer thinner for most primers) into the cup. Spray it through the gun until clean solvent comes out.
- Disassemble and Clean: Take the air cap, fluid nozzle, and needle out. Soak them in cleaner and use a soft brush (never metal tools that can scratch!) to remove all residue .
- Lubricate: After cleaning, apply a small amount of gun oil to the fluid needle and trigger assembly to keep it moving smoothly.
- Storage: Some professionals recommend storing the gun with a small amount of thinner in the cup to keep the fluid passage sealed and clean, as evidenced by a painter who stores his guns with “lacquer thinner in the cup” .
Conclusion: Your Path to the Perfect Primer Foundation
Choosing the best automotive paint gun for primer is a deliberate process that balances technology, features, and budget. There is no single “best gun” for everyone, but there is a perfect gun for your specific needs. For the professional seeking uncompromising quality, a dedicated HVLP system from DeVilbiss or SATA is the undeniable choice. For the dedicated DIYer or restorer, the exceptional value of an Eastwood or a well-reviewed VEVOR kit can deliver outstanding results. And for the occasional user, a budget option from Harbor Freight can be a capable tool for getting the job done.
Remember that the gun is only one part of the equation. A robust air supply, meticulous surface preparation, and practiced technique are equally vital. By investing in the right tool for the job and mastering its use, you lay the literal and figurative foundation for a paint job that is smooth, durable, and truly professional. Don’t be afraid to practice on old panels or cardboard to get a feel for your gun’s pattern and behavior—the experience you gain will be reflected in the quality of your final finish.
Key Takeaways
- The best automotive paint gun for primer is typically an HVLP model with a 1.8mm to 2.0mm fluid nozzle designed to handle thicker, high-build materials .
- A dedicated primer gun is essential for proper atomization and efficient application, setting the stage for a flawless basecoat and clearcoat.
- Your air compressor must meet the gun’s CFM requirement (often 12+ CFM), and a high-quality air dryer/filter is non-negotiable for a contaminant-free finish .
- Professional brands like DeVilbiss and SATA lead in performance and durability, while Eastwood and VEVOR offer exceptional performance for the price .
- Immediate and thorough cleaning after use is the most critical step for maintaining your primer gun’s performance and longevity .

